
.png)


.webp)
- Mithu Rahman
- 28 June, 2024
Solving Kitchen Tap the Complete Guide to Repair in Singapore
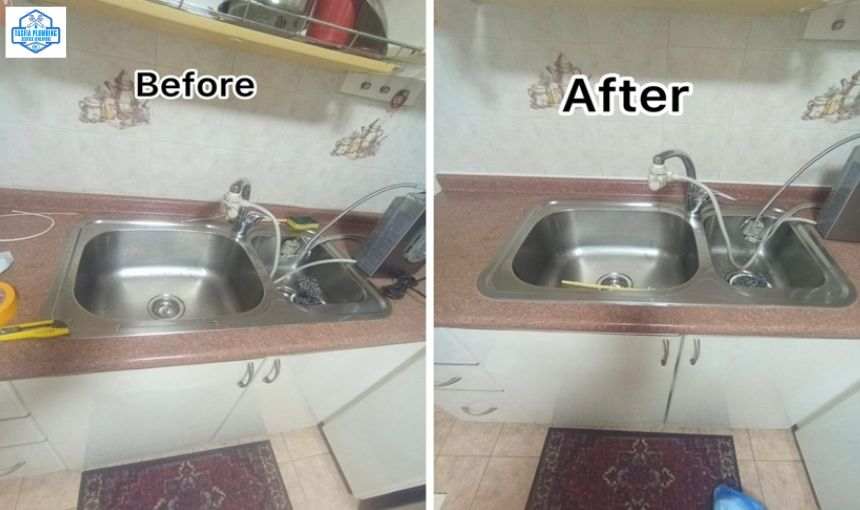
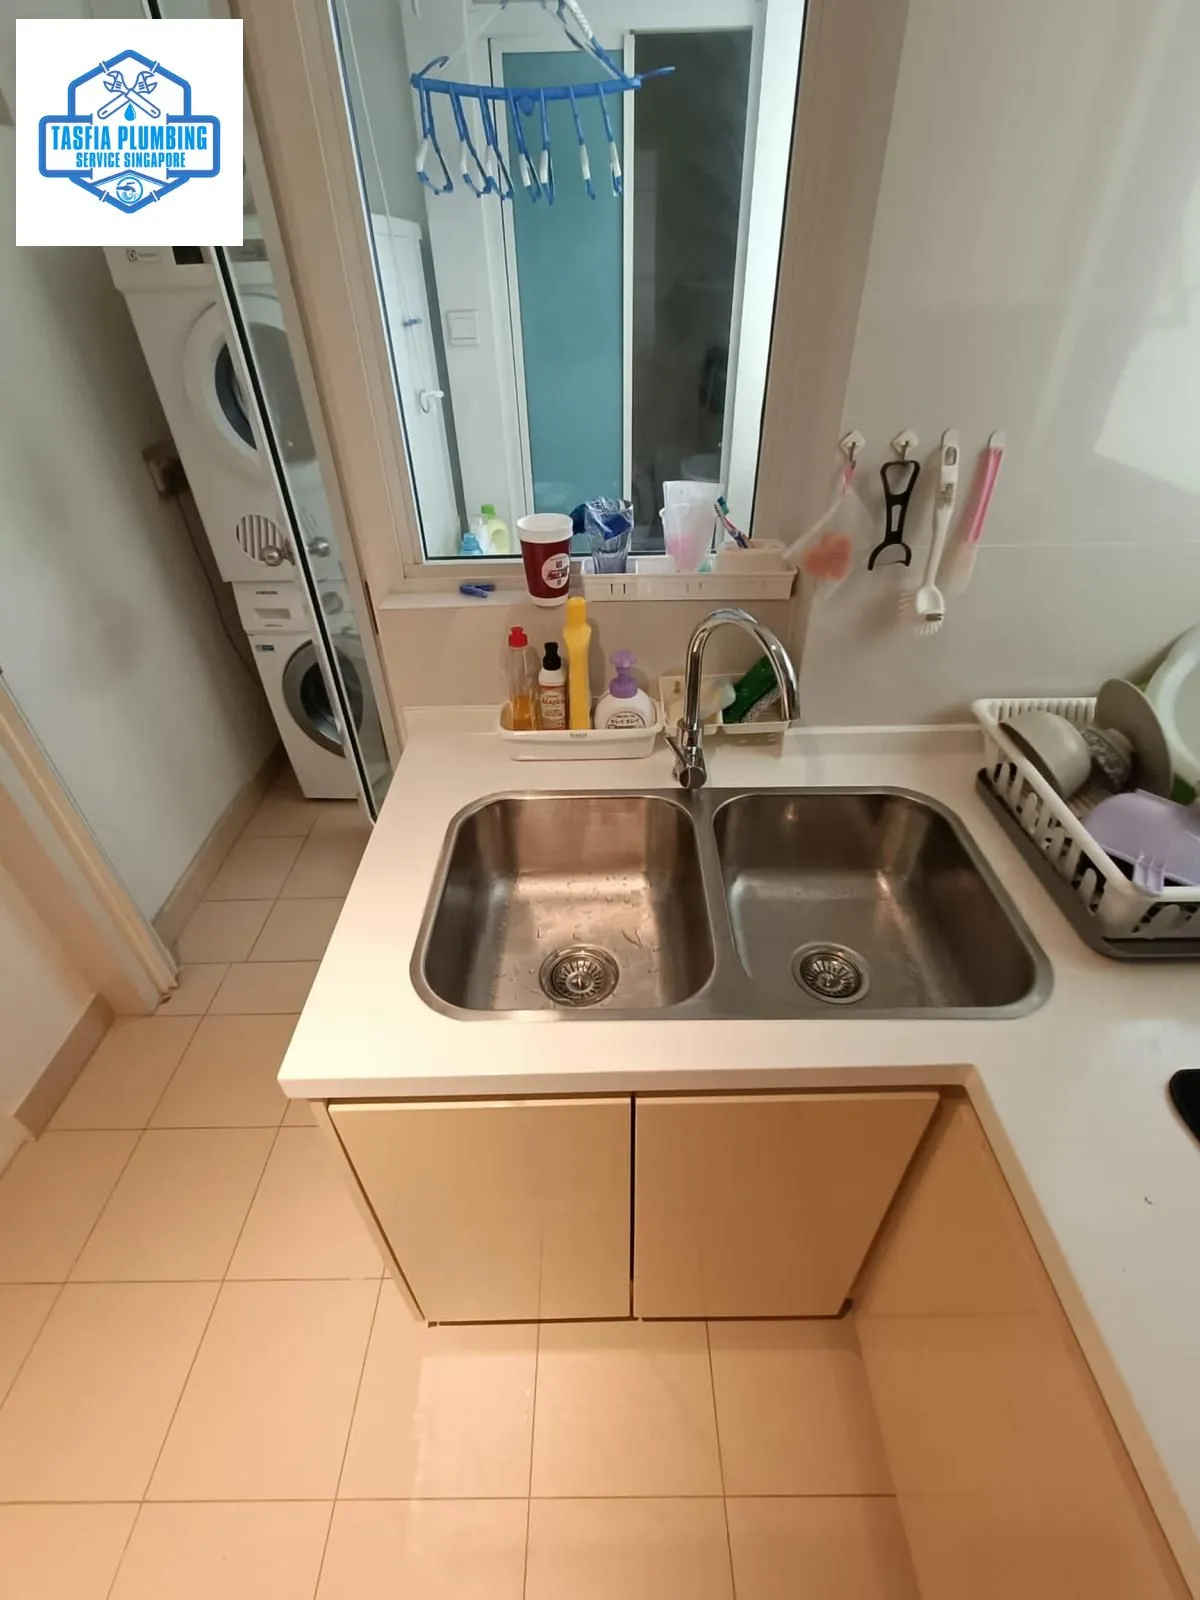
A properly functioning kitchen sink tap is essential for everyday tasks, from washing dishes to filling pots. Suddenly, use the kitchen sink tap facing the various problem. This can disrupt your kitchen routine.
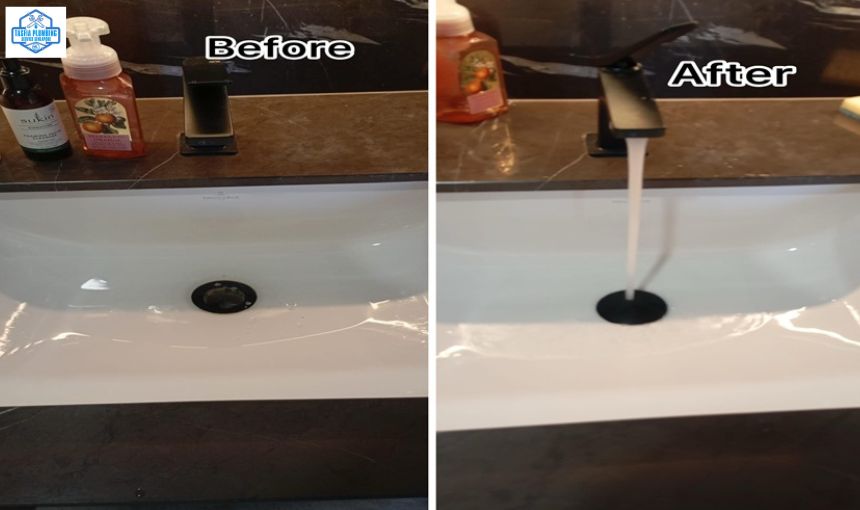
How do you a kitchen sink tap Repairing?
Our experienced team at Tasfia Plumbing is always at your side to solve kitchen sink tap problems. Our plumber team at first your will identify the problem and will inform you and solve it.
By following step-by-step instructions, you can fix your kitchen faucet
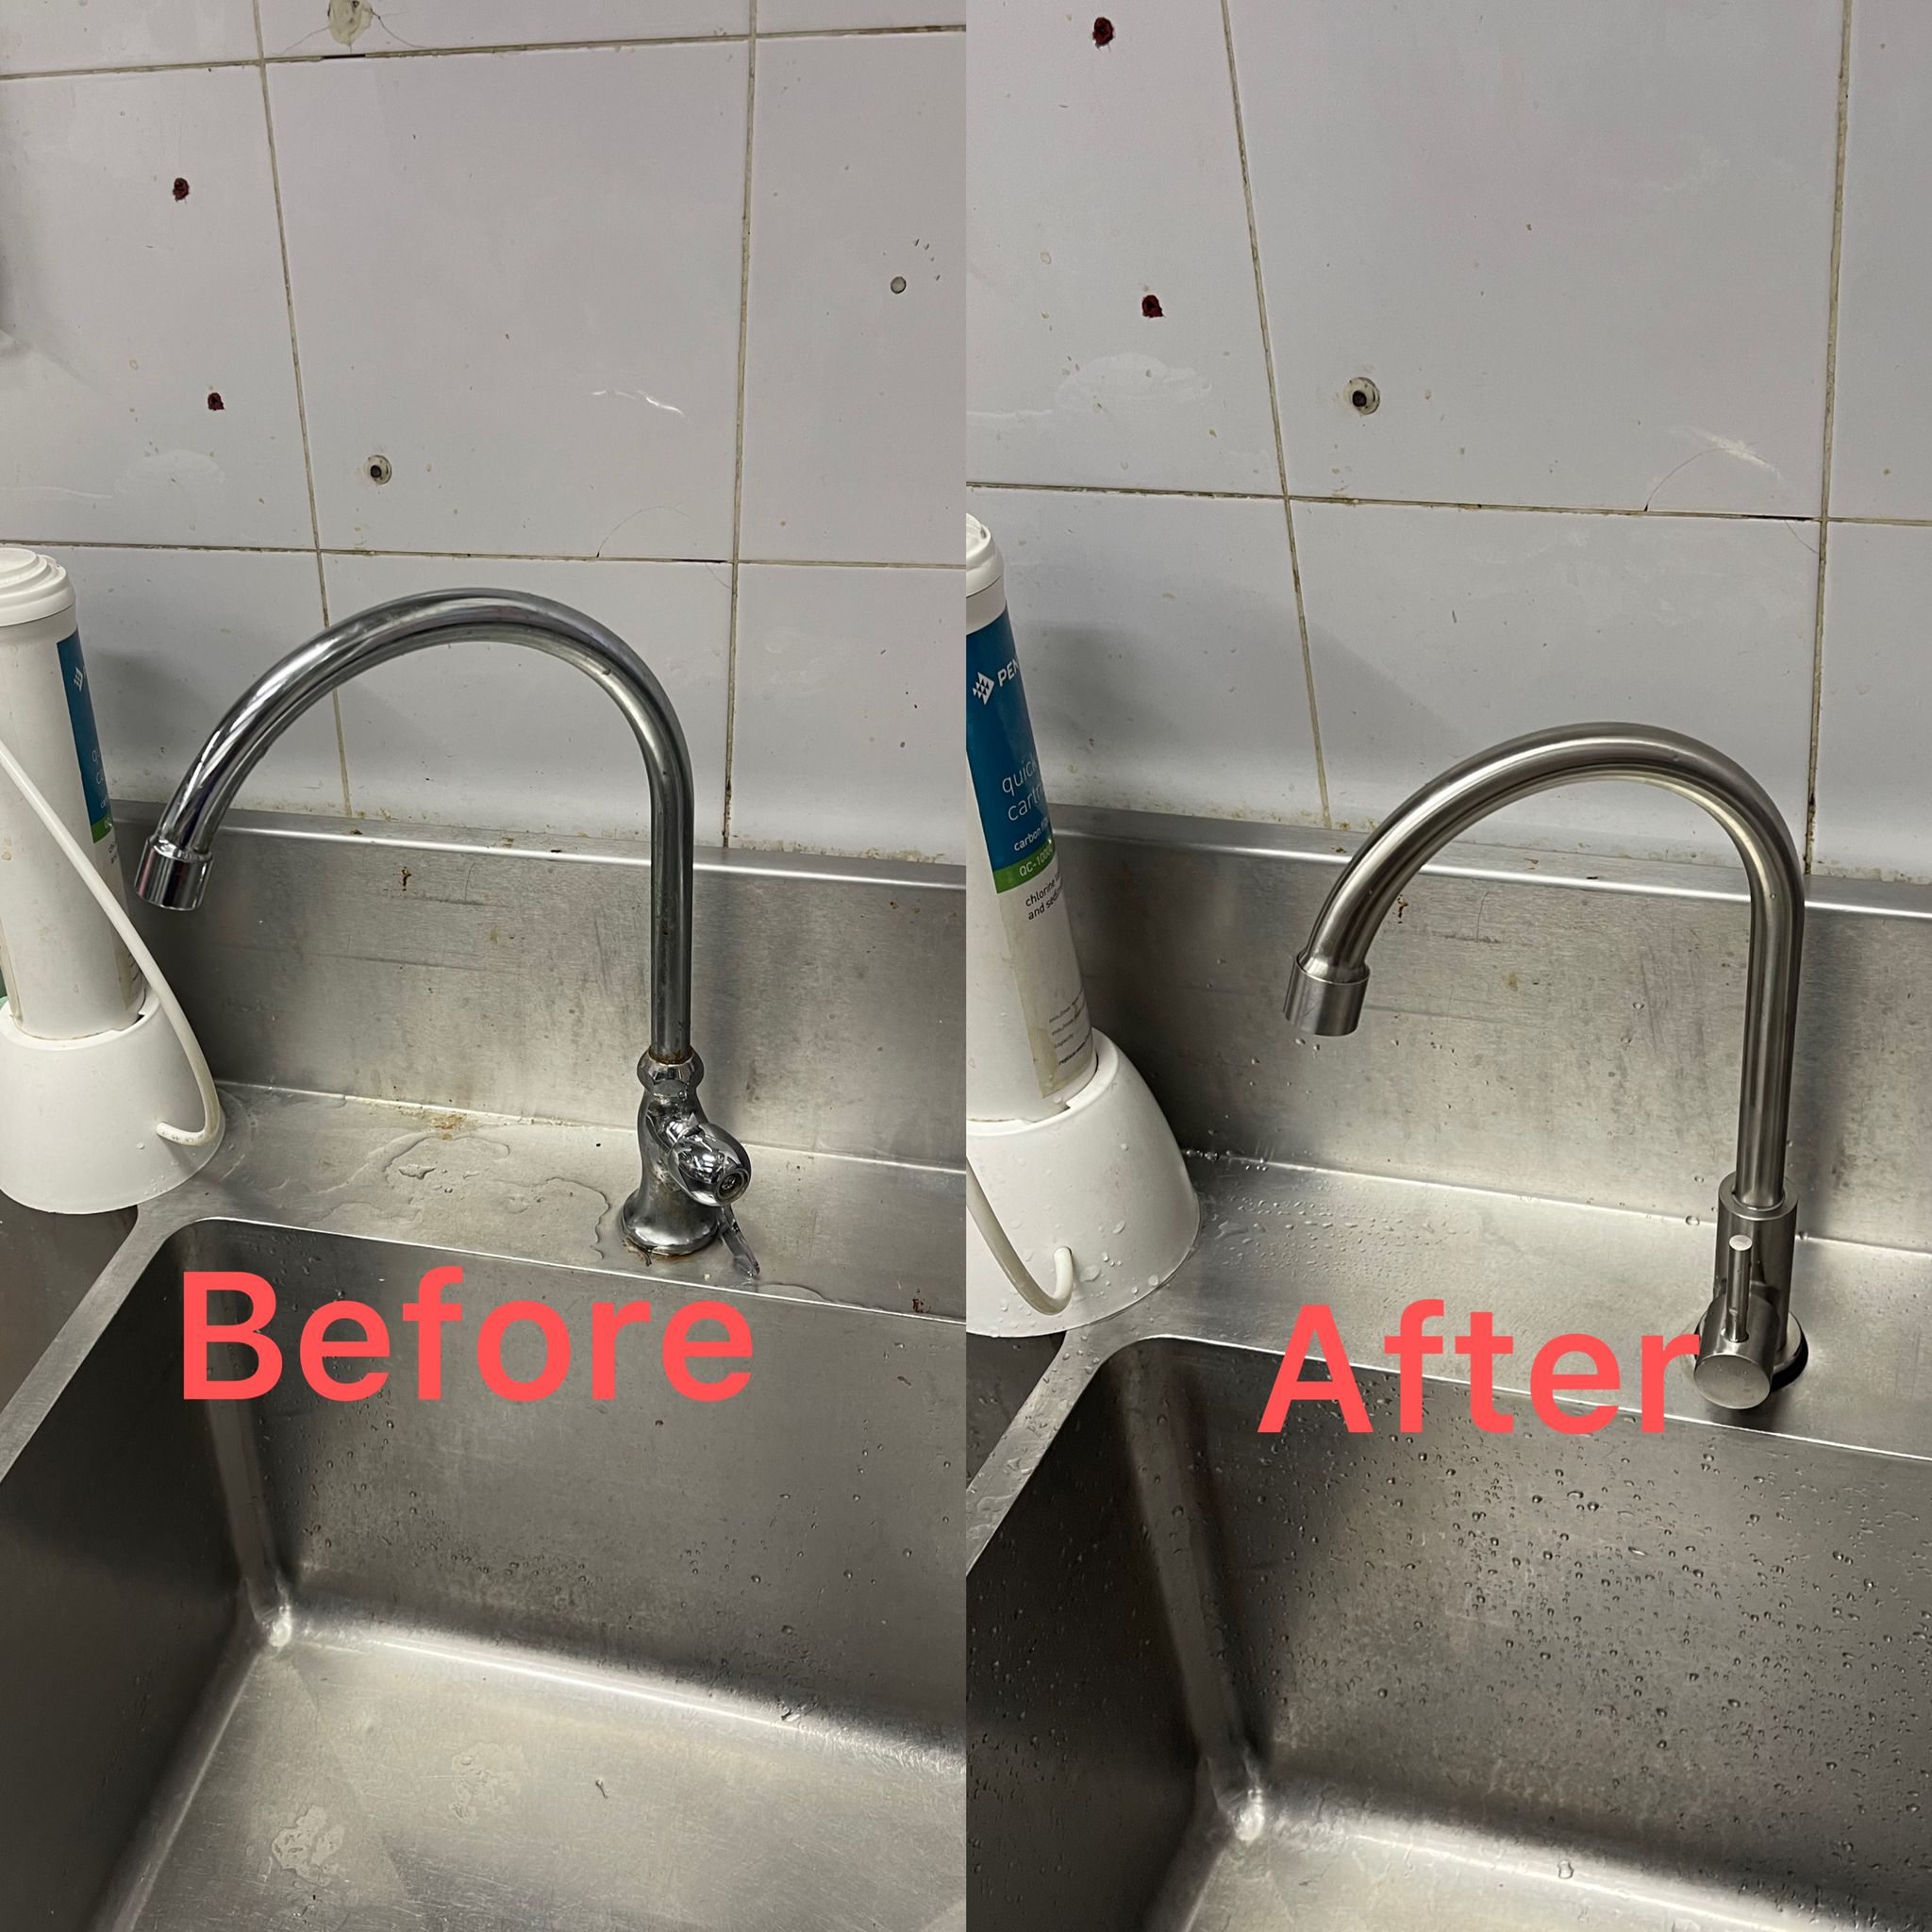
Part-1: Identify Common Tap Issues:
Before starting any repair or installation work, it's crucial to identify the problem. Common issues with kitchen sink taps include leaks, low water pressure, and improper installation. We'll guide you through diagnosing these issues and determining the best course of action.Part-2: Repairing Common Tap Problems:
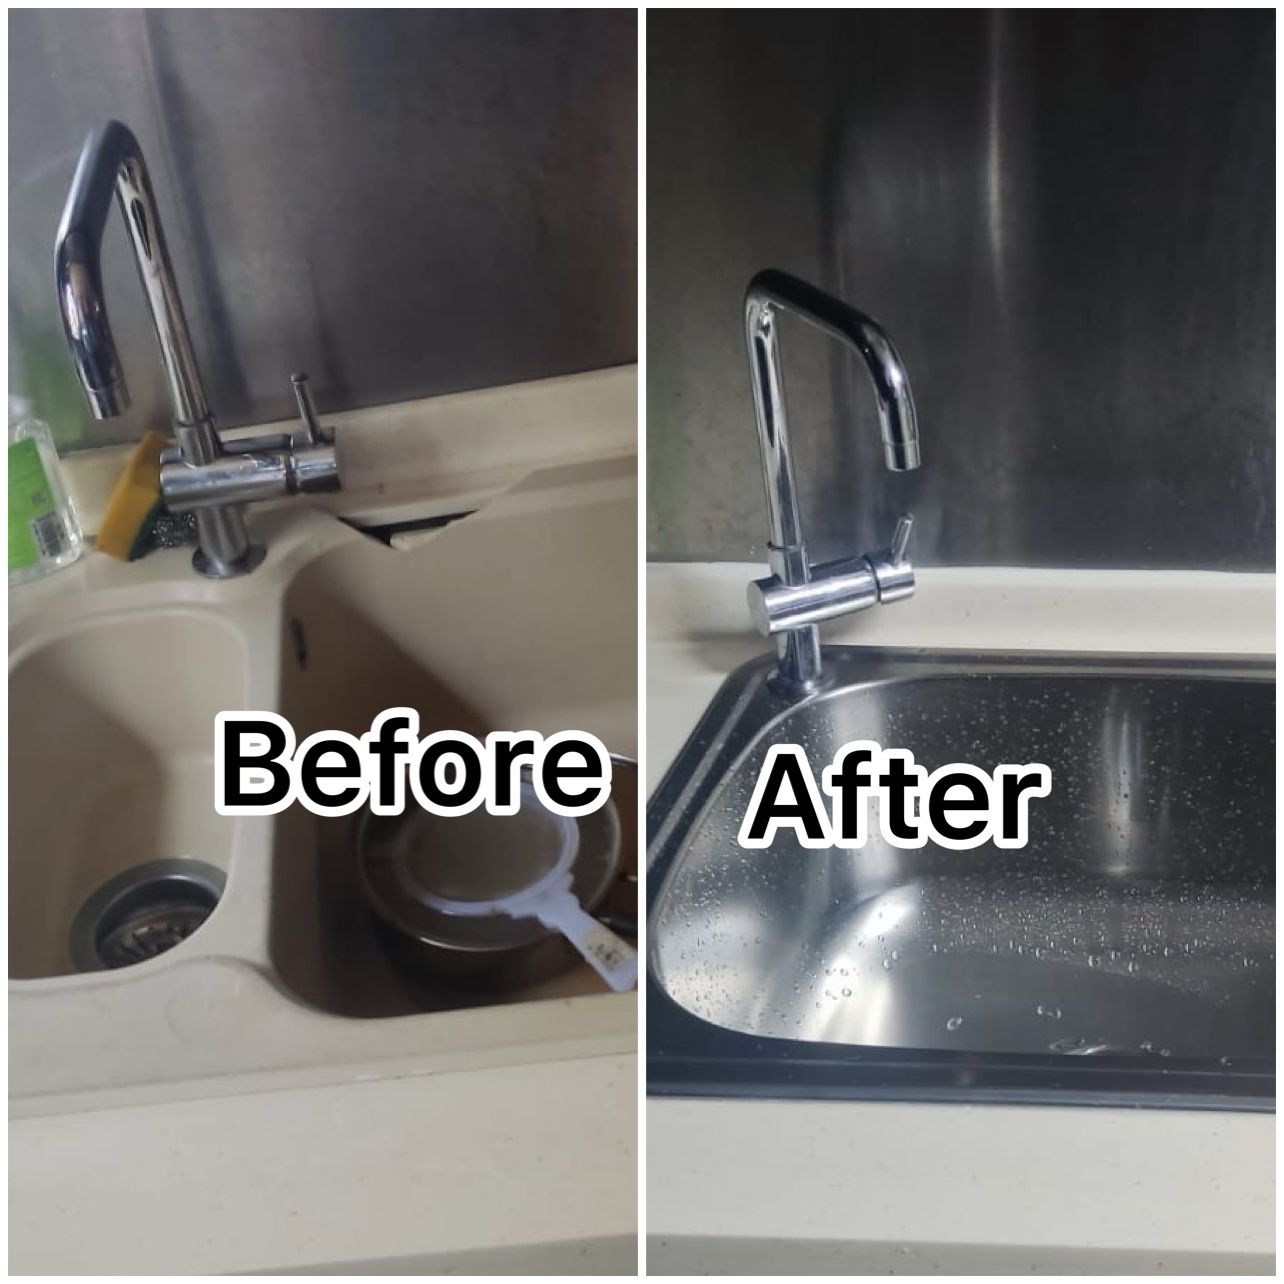
1. Leaking Tap:- Turn off the water supply to the tap.
- to isolate the tap handle and inspect for worn-out washers or O-rings.
- Replace any damaged components and reassemble the tap.
- Test for leaks and adjust as necessary.
2. Low Water Pressure:
- Check for mineral deposit or debris in the aerator.
- Remove the aerator and clean it thoroughly.
- Inspect the water supply lines for inhibition or leaks.
- Flush the tap to remove any remaining debris.
- Inspect the cartridge or valve for wear and tear.
- Replace the cartridge or valve if necessary.
- Test the tap to ensure proper functionality and adjust as needed.
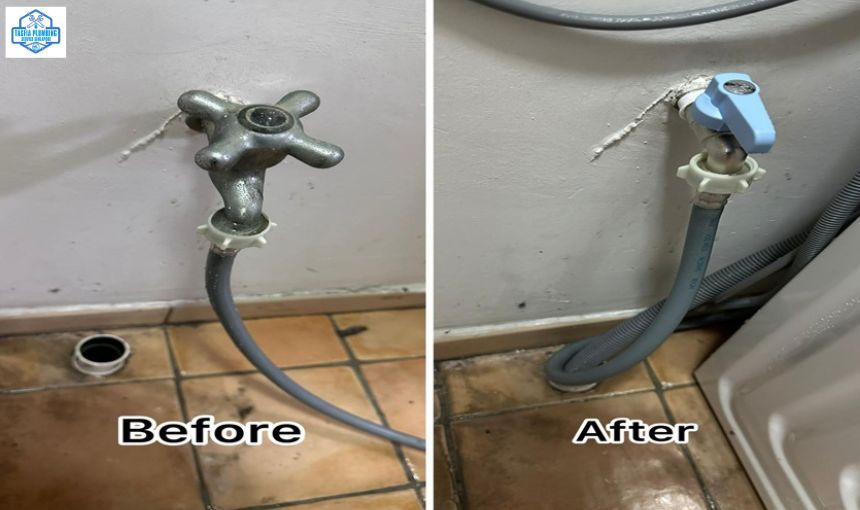
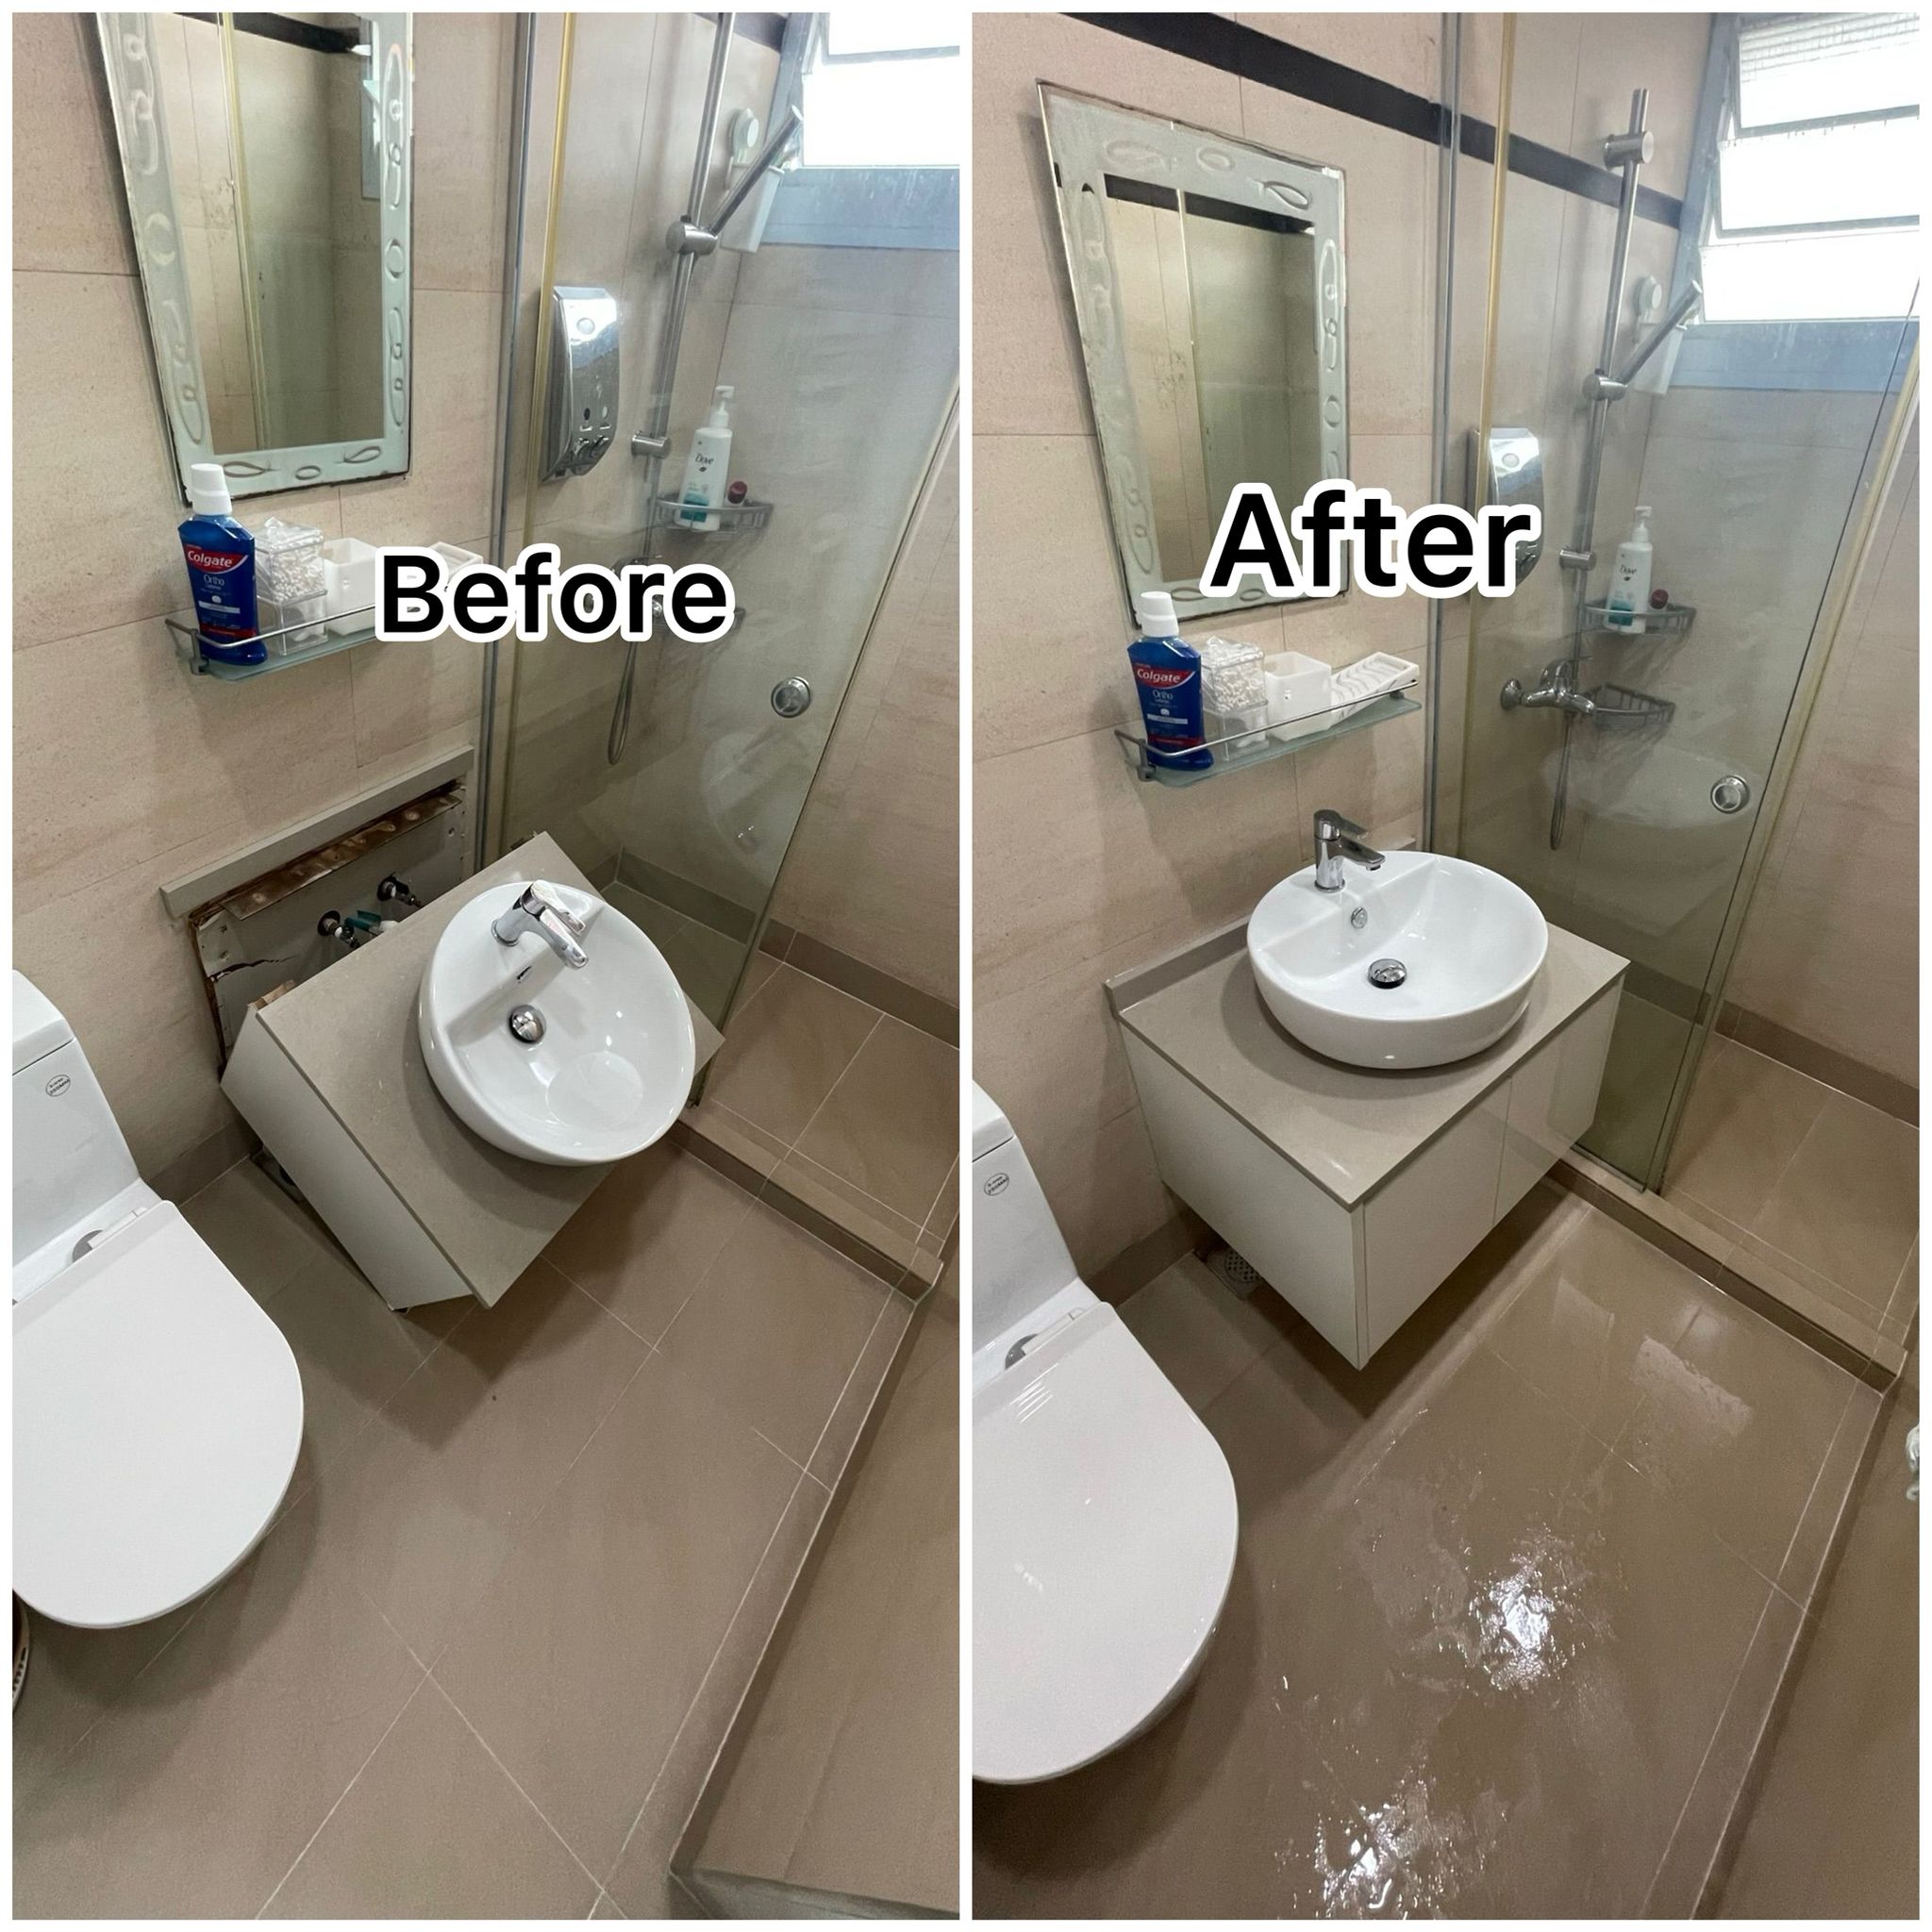
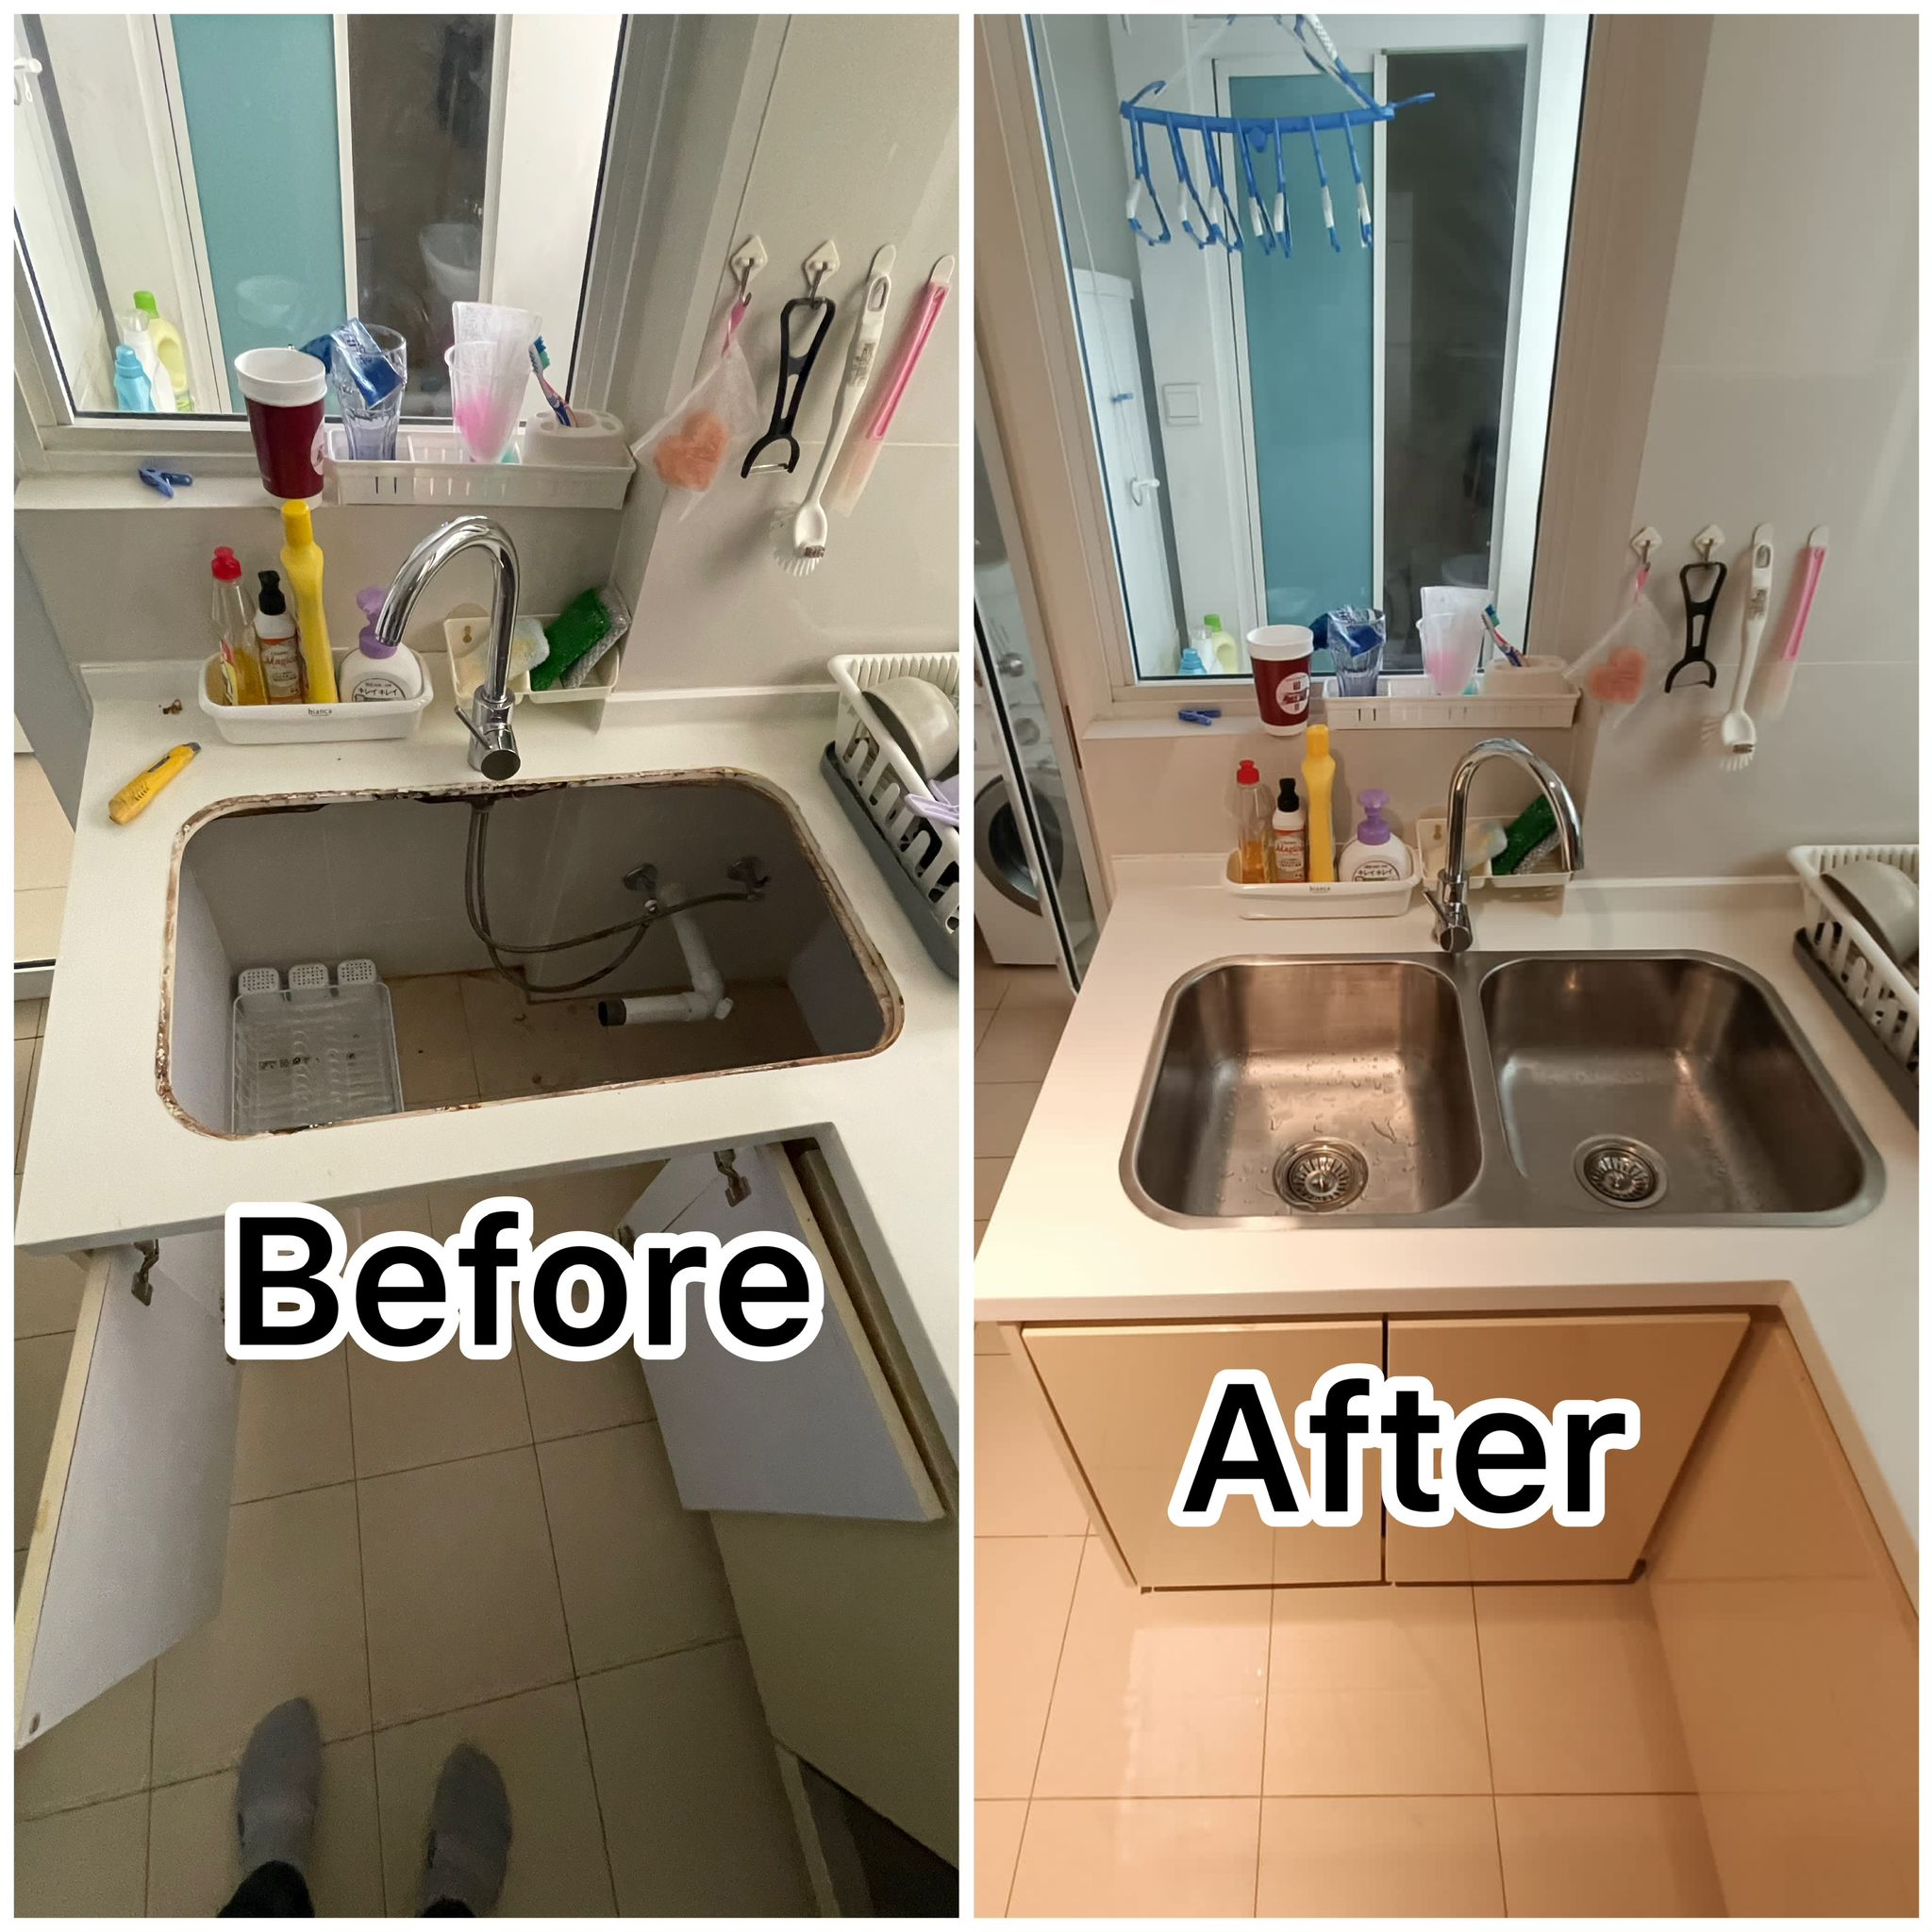
Part-3: Installing a New Kitchen Sink Tap:
1. Preparation:- Gather the necessary tools and materials, including a new tap, adjustable wrench, plumber's tape, and silicone sealant.
- Shut off the water supply to the tap and open the faucet to drain any remaining water.
2. Removing the Old Tap:
- Disconnect the supply lines and remove the old tap from the sink.
- Clean the mounting area and remove any old sealant or debris.
3. Installing the New Tap
- Apply plumber's tape to the threaded connections of the new tap.
- Insert the new tap into the mounting hole and secure it in place with nuts or screws.
- Connect the supply lines to the corresponding connections on the new tap.
4. Testing and Adjustments:
- Turn on the water supply and check for leaks.
- Adjust the position of the tap if necessary to ensure proper alignment and functionality.
.jpg)