
.png)


.webp)
- Mithu Rahman
- 28 June, 2024
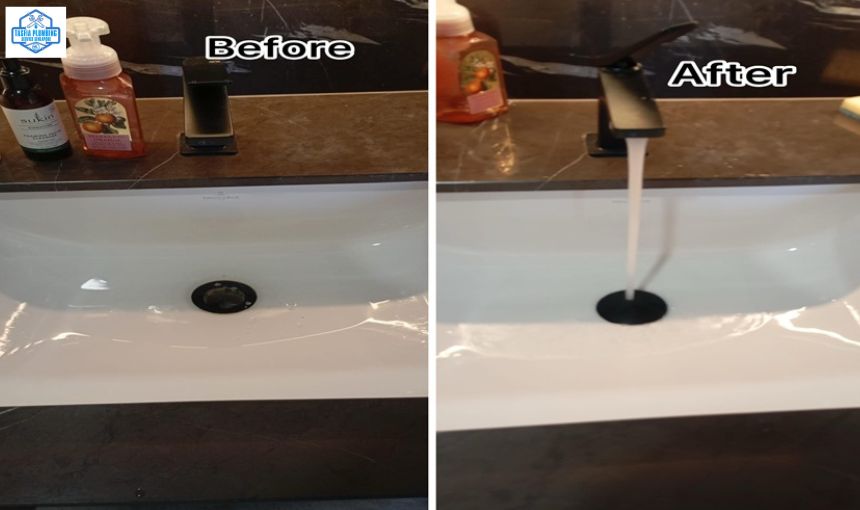
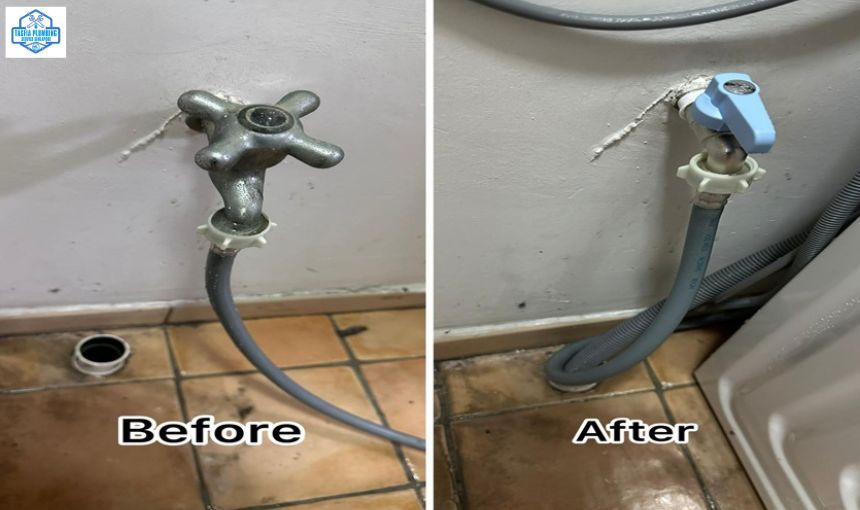
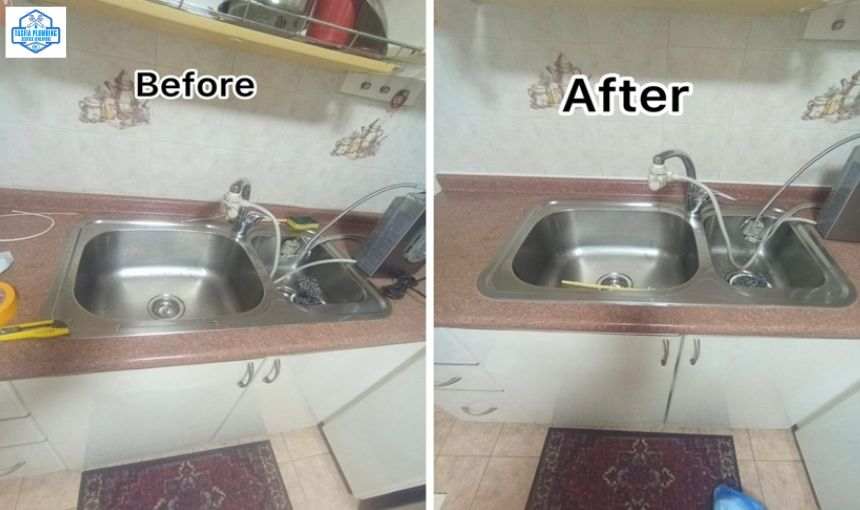
Expert Guide to Replacing a Sink Faucet: Step-by-Step Instructions and Tips
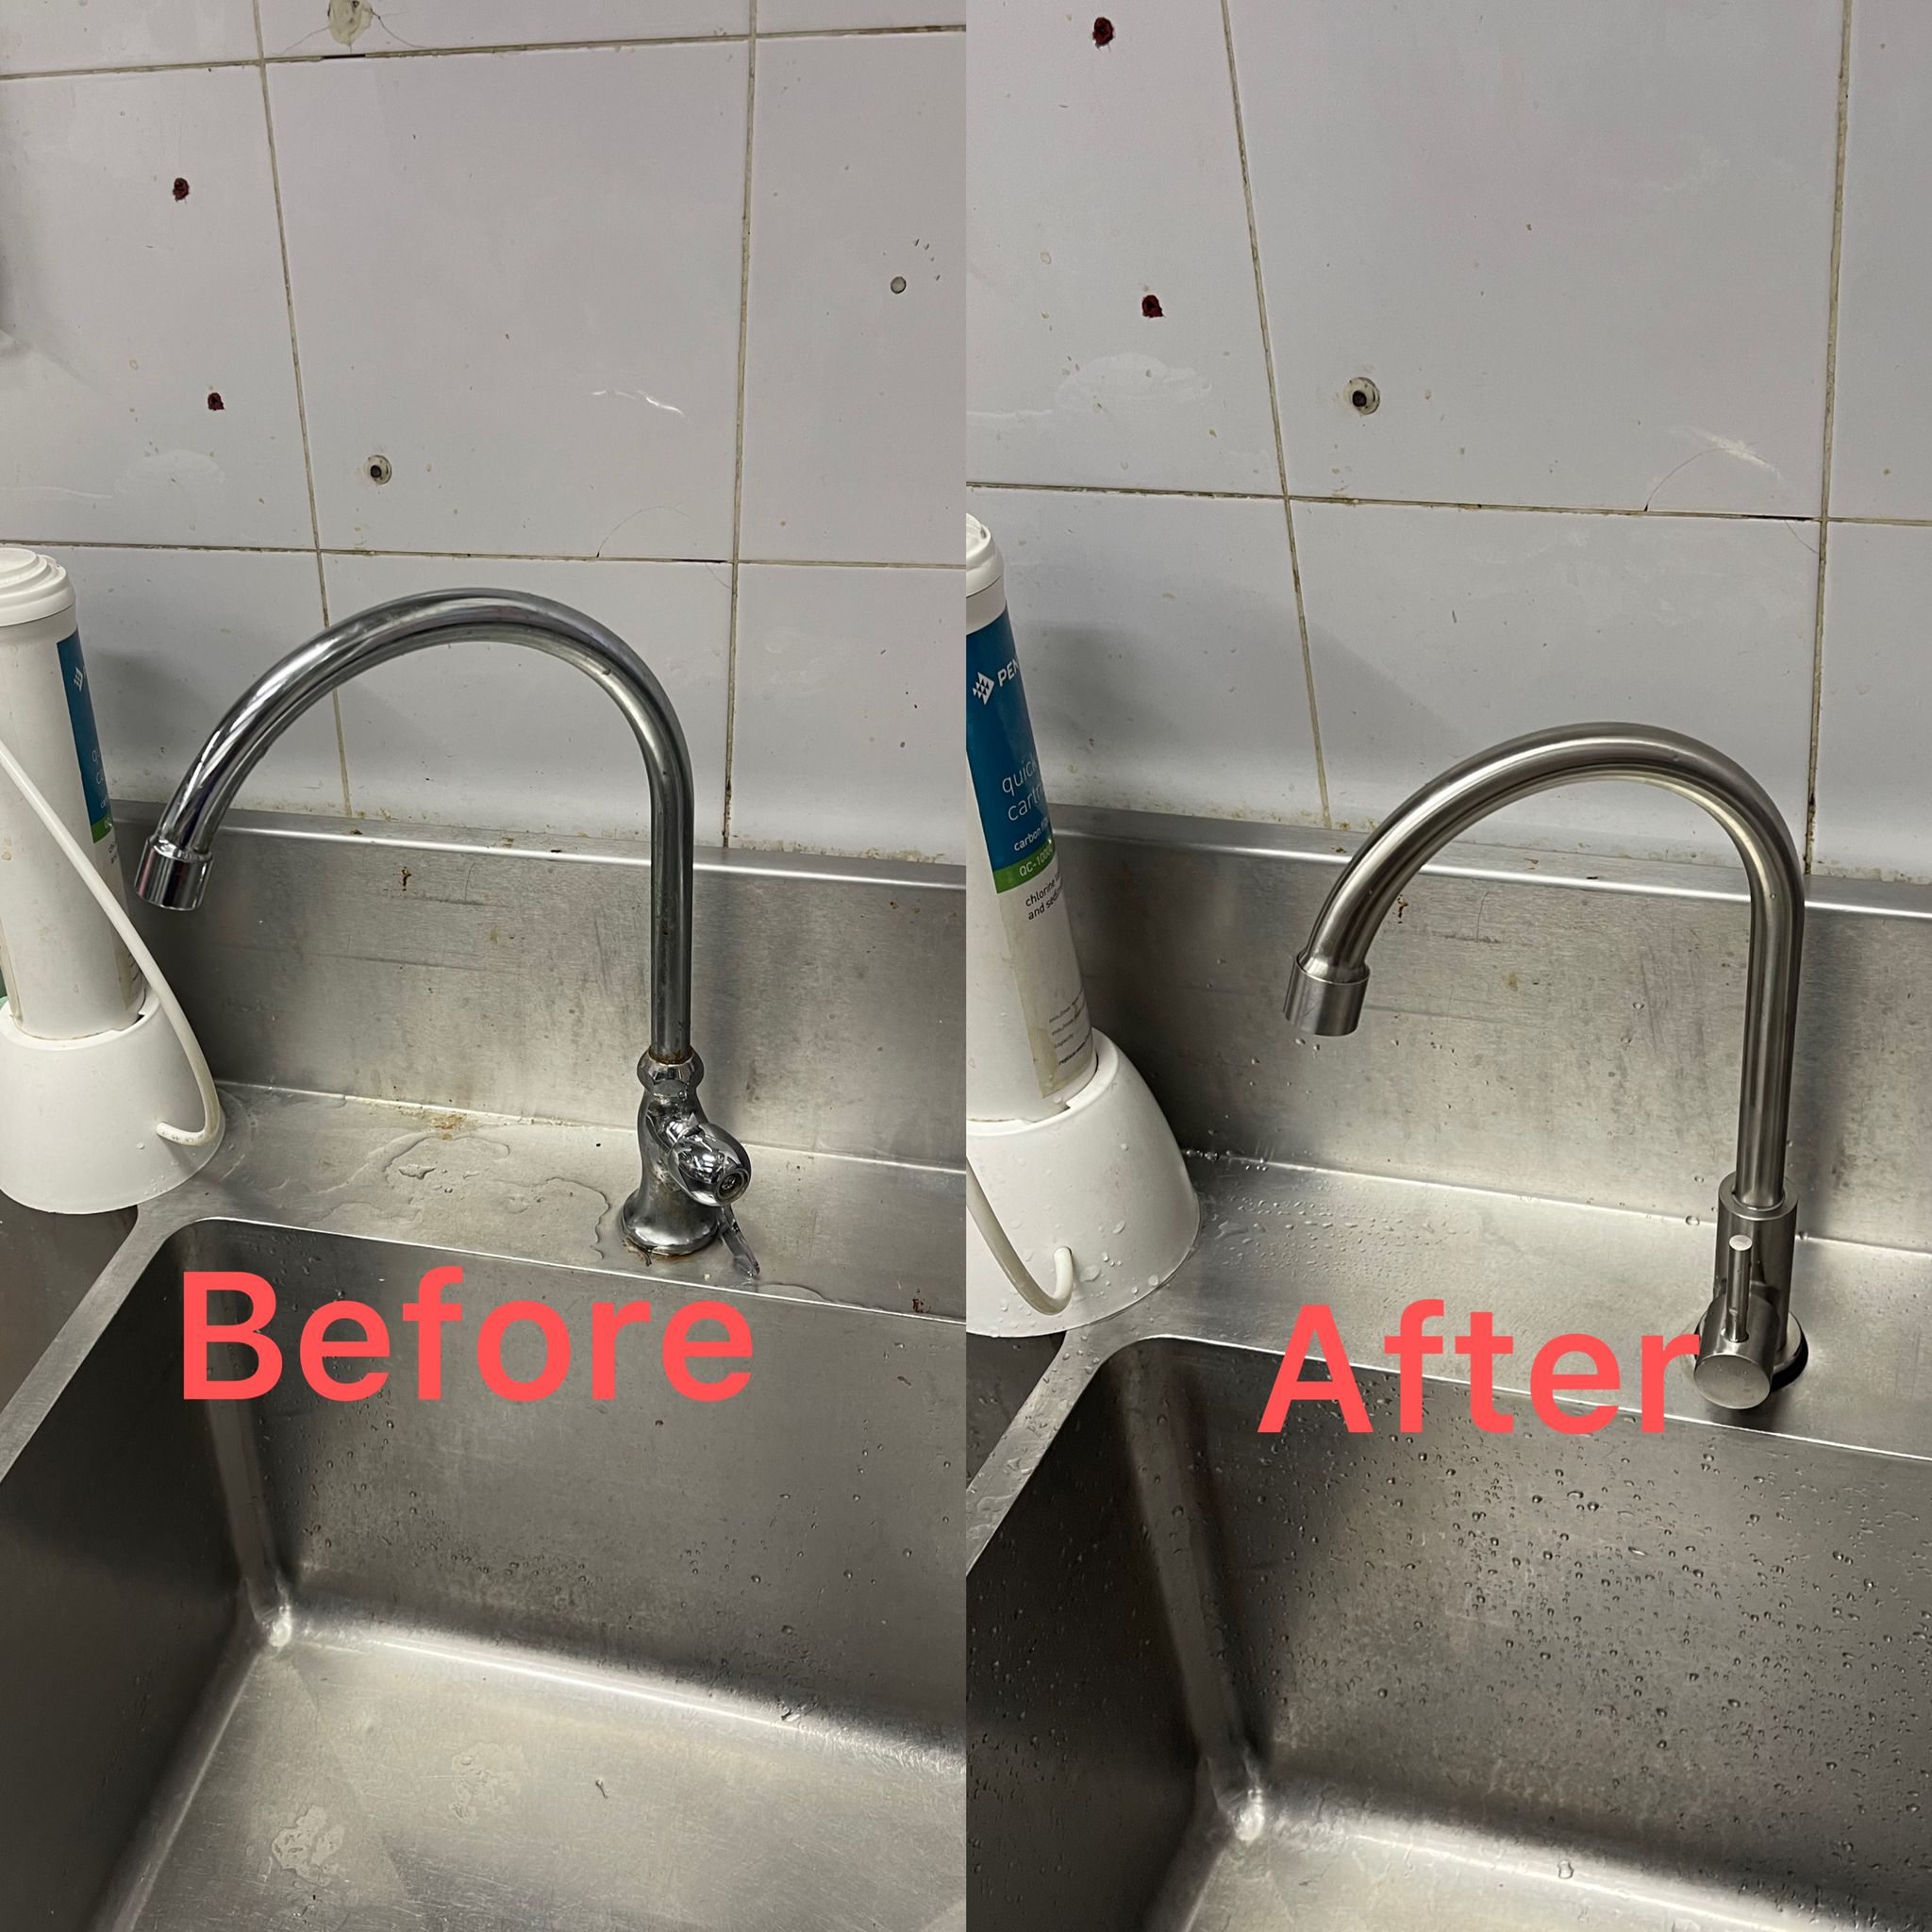
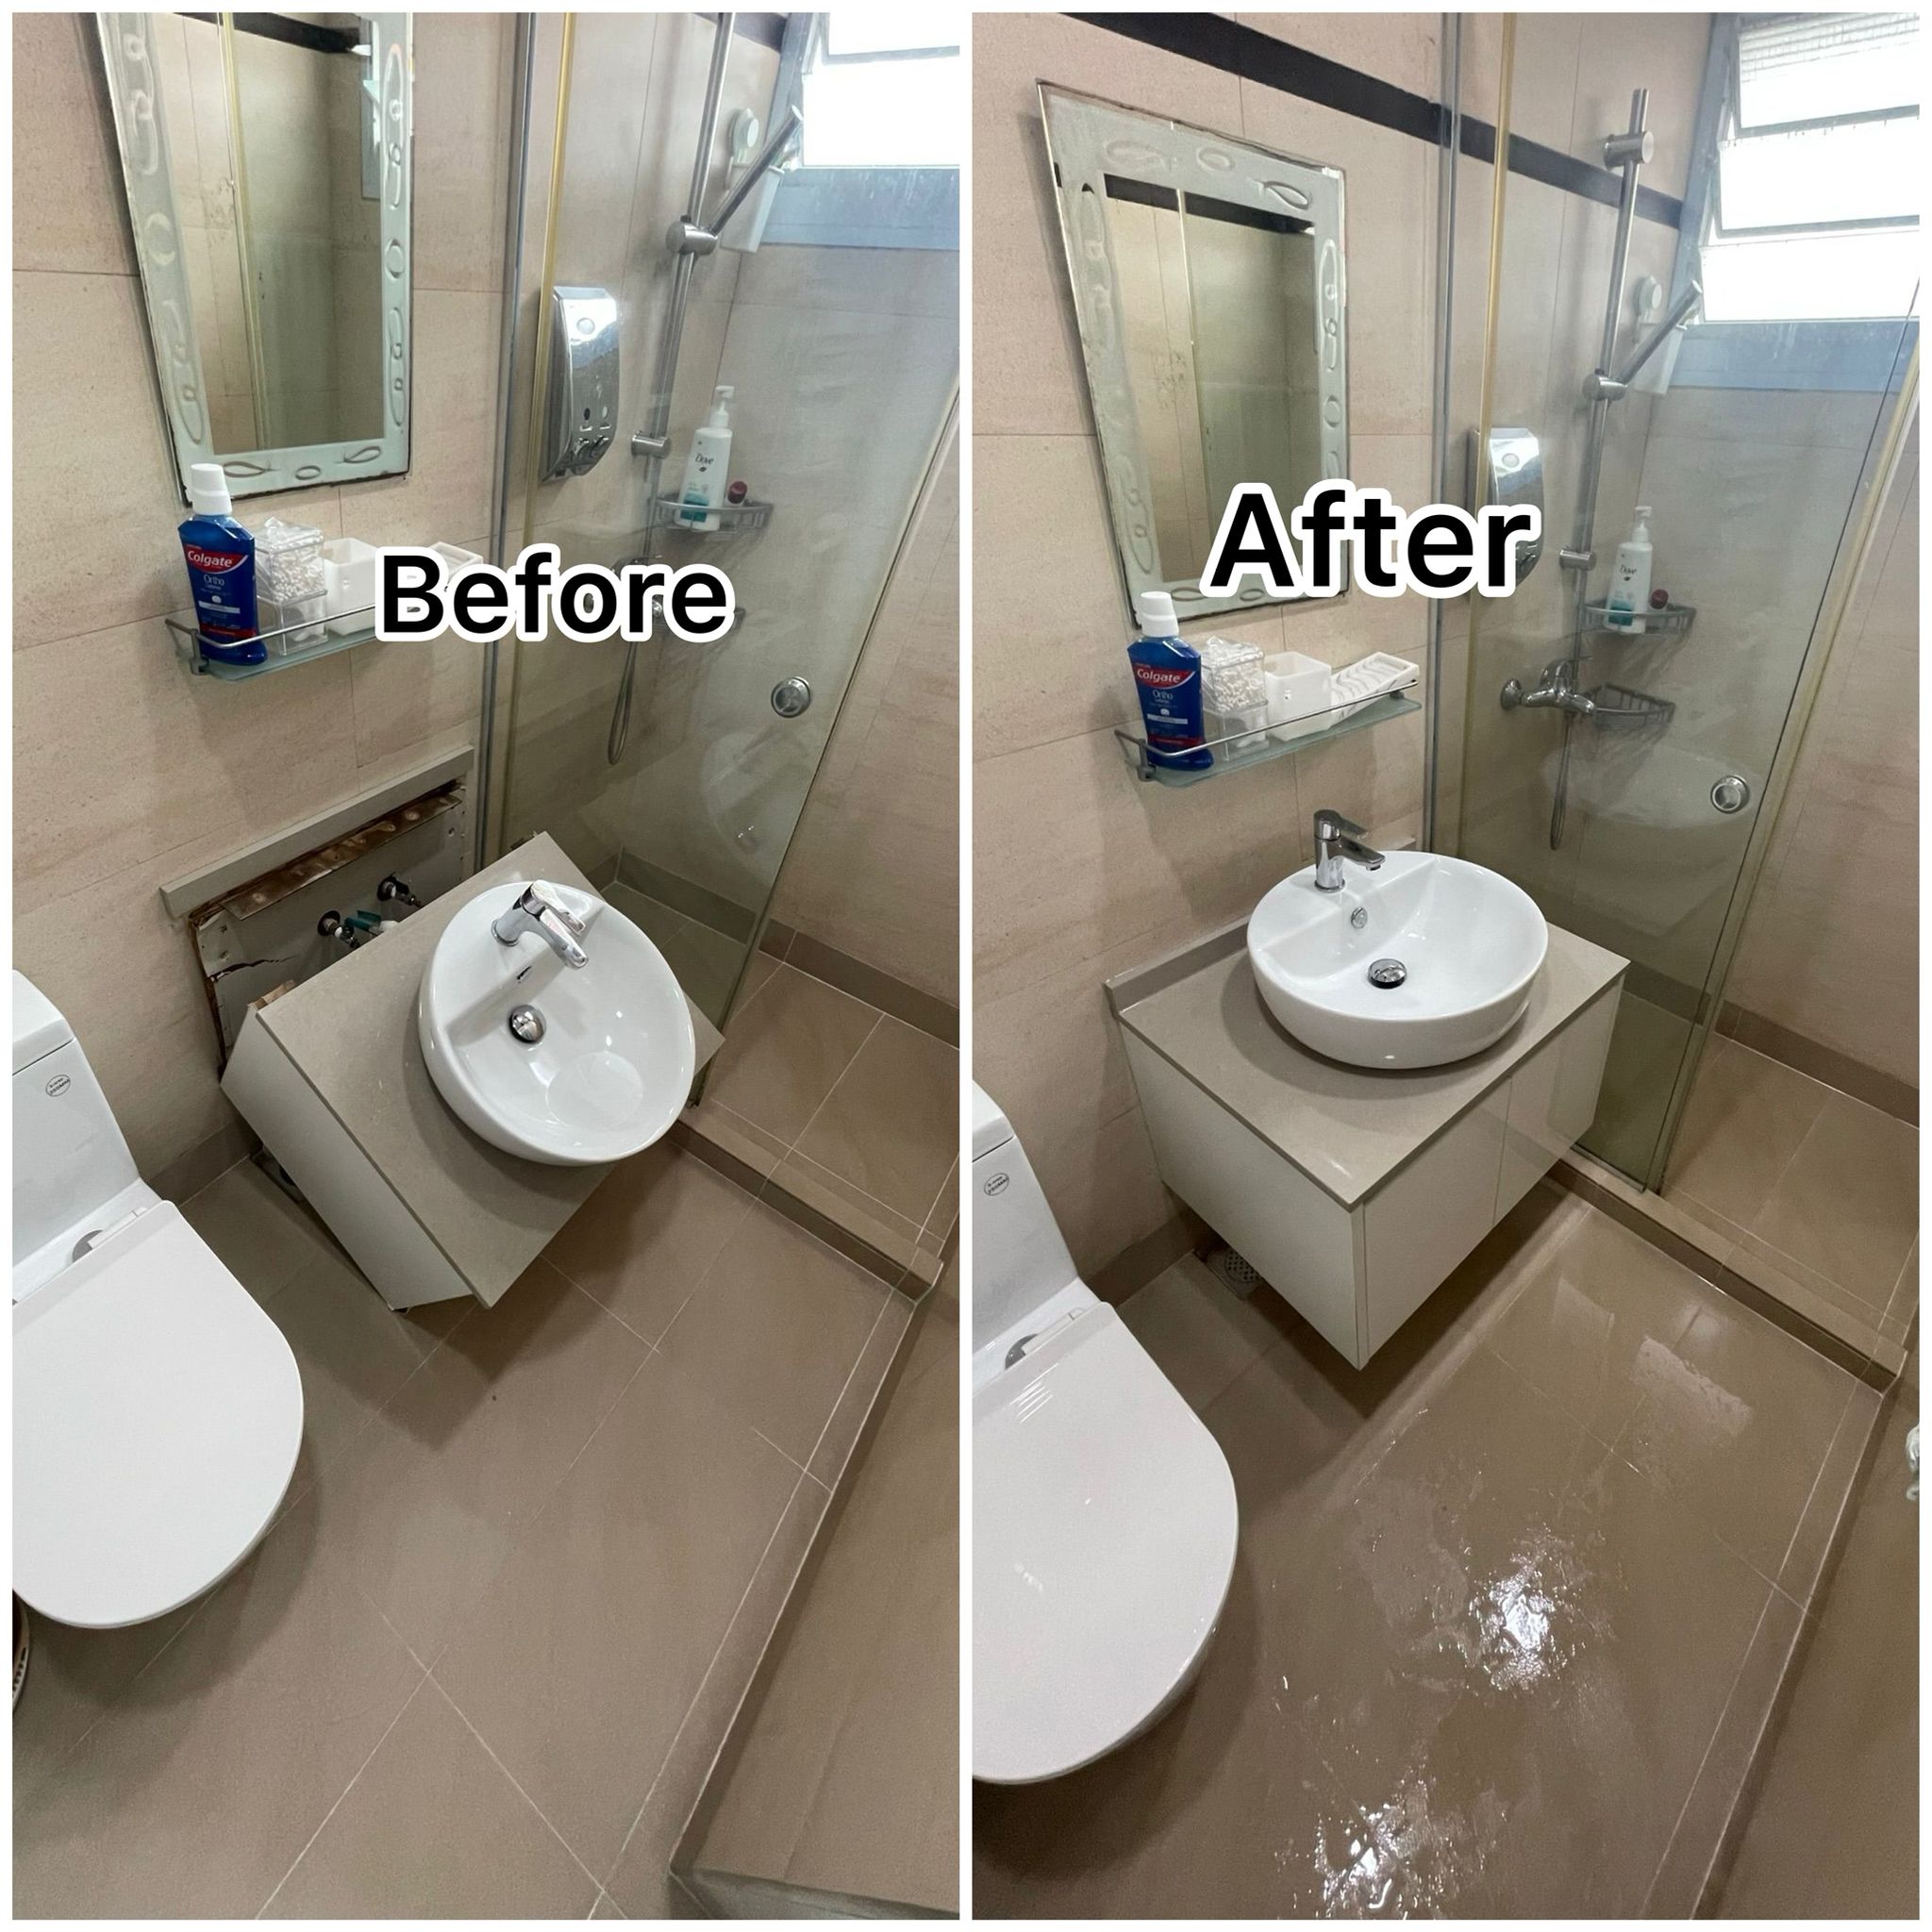
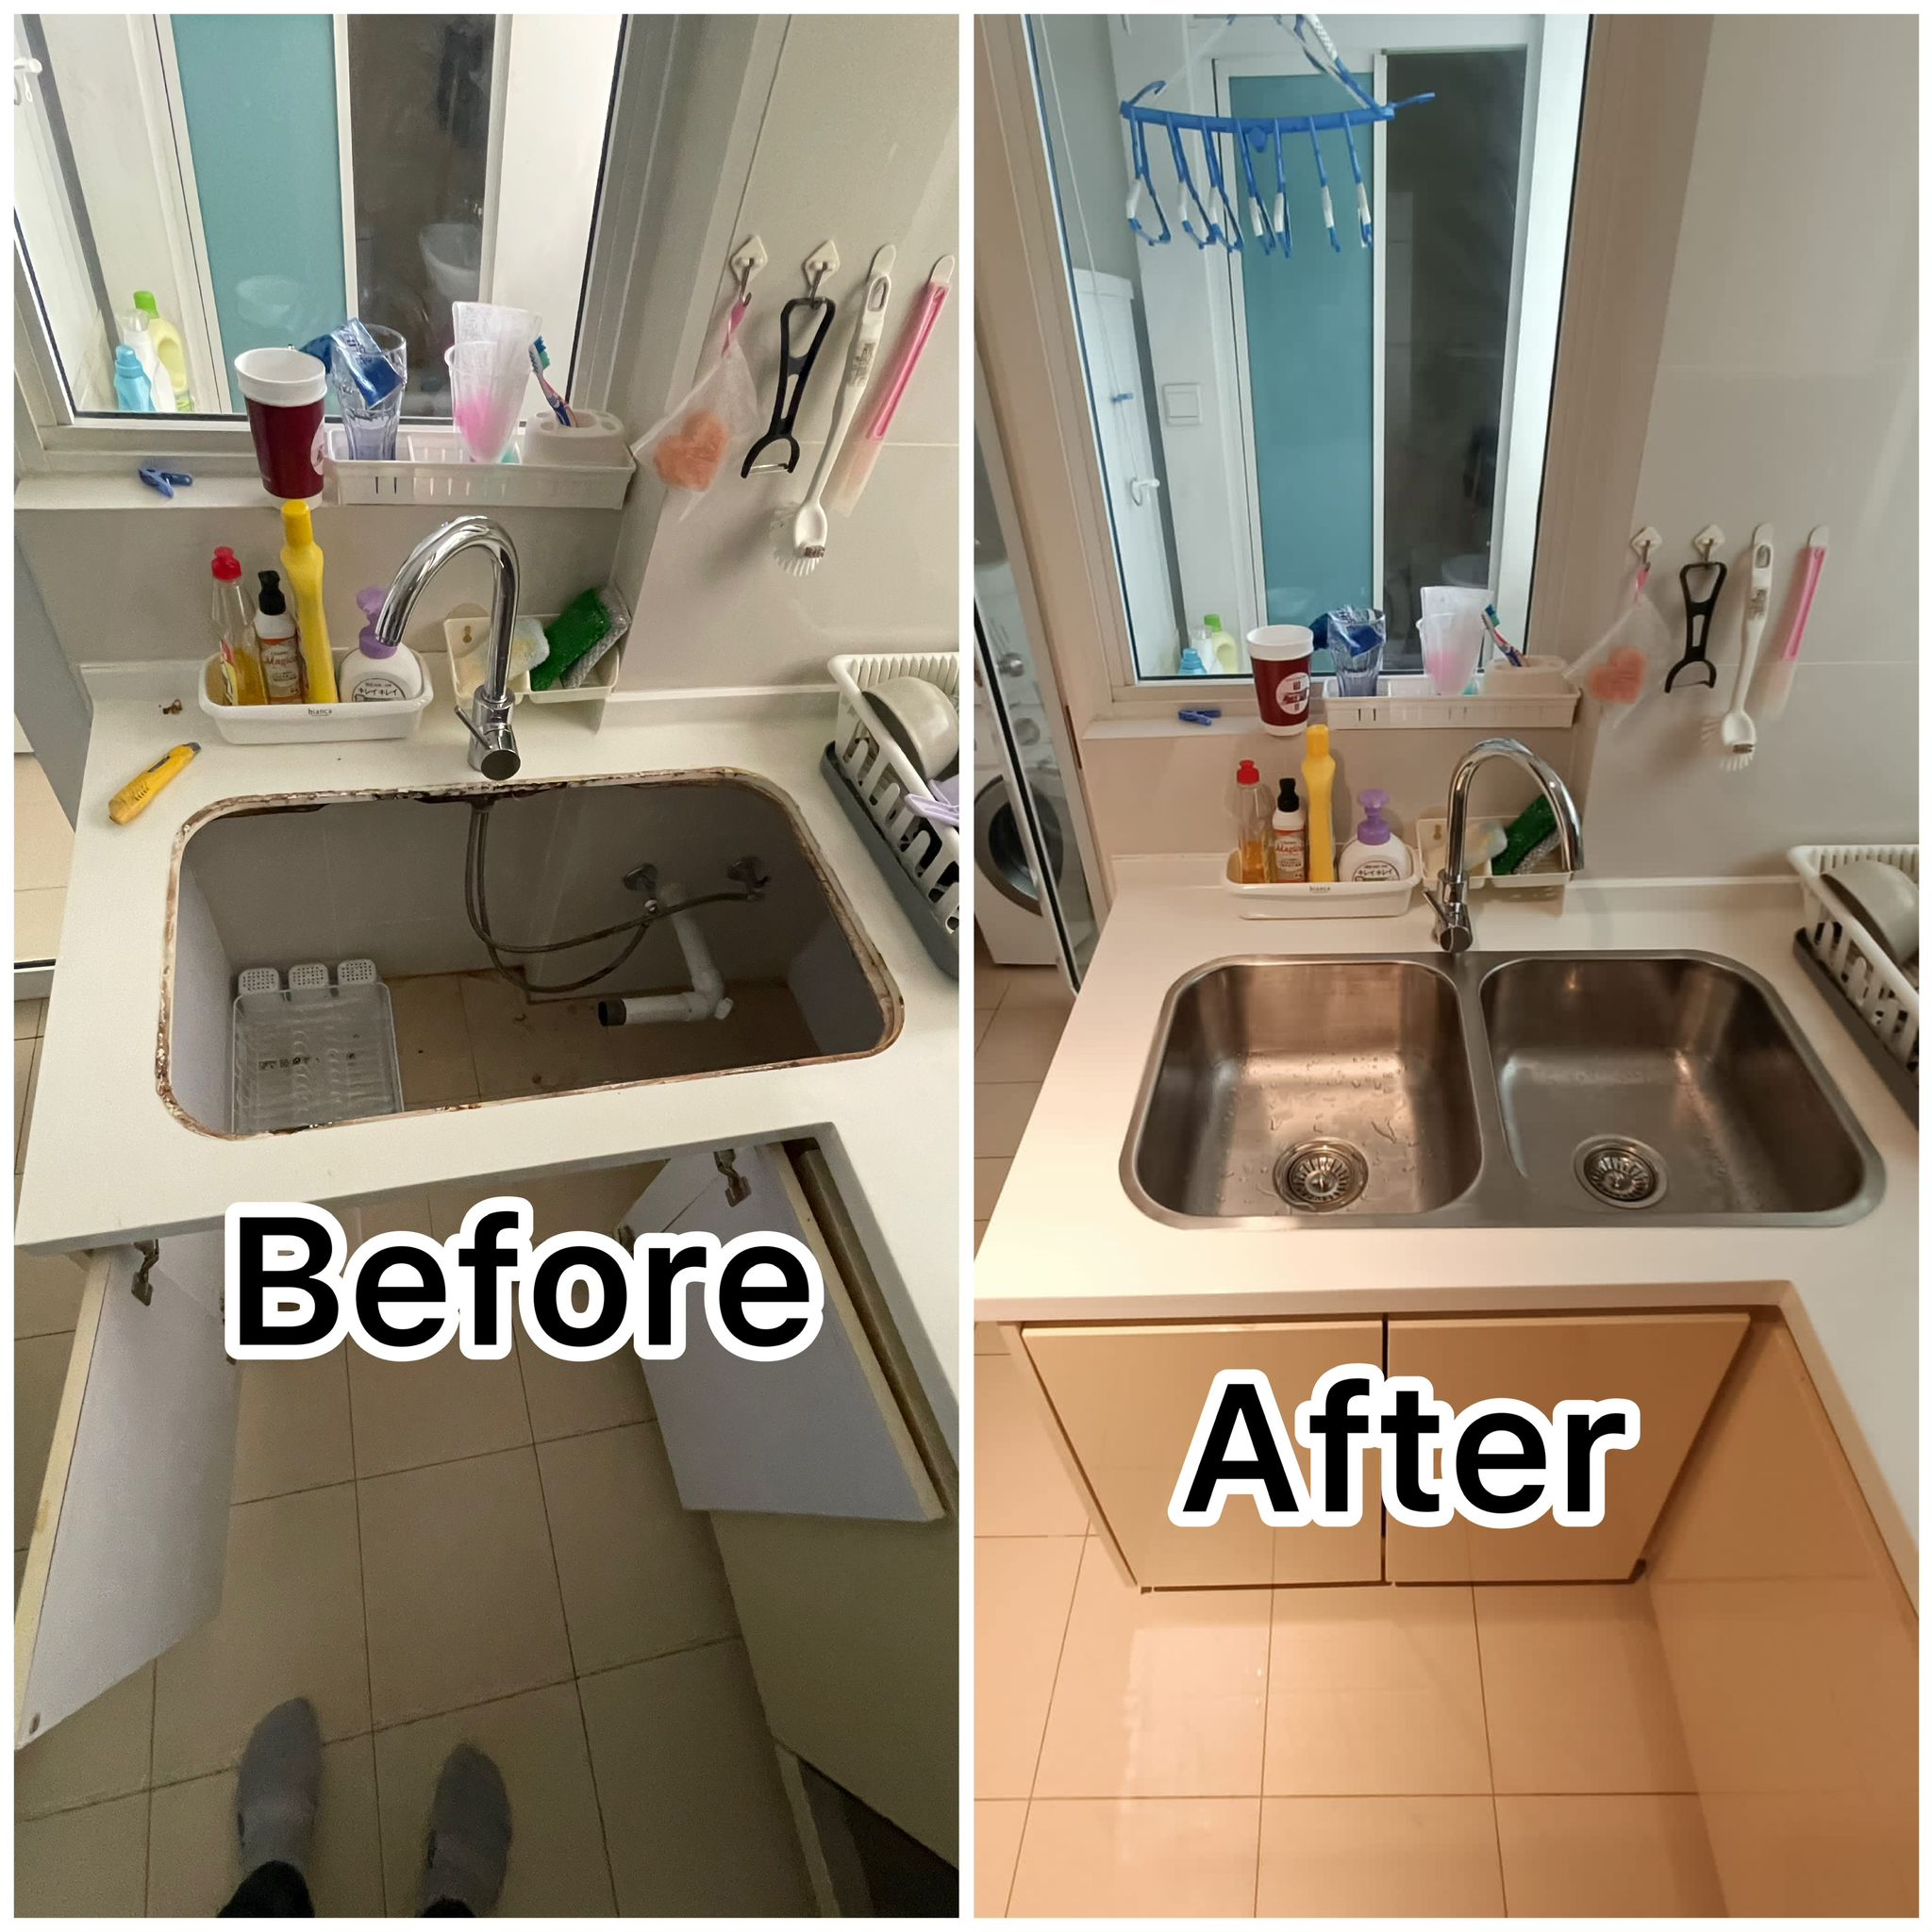
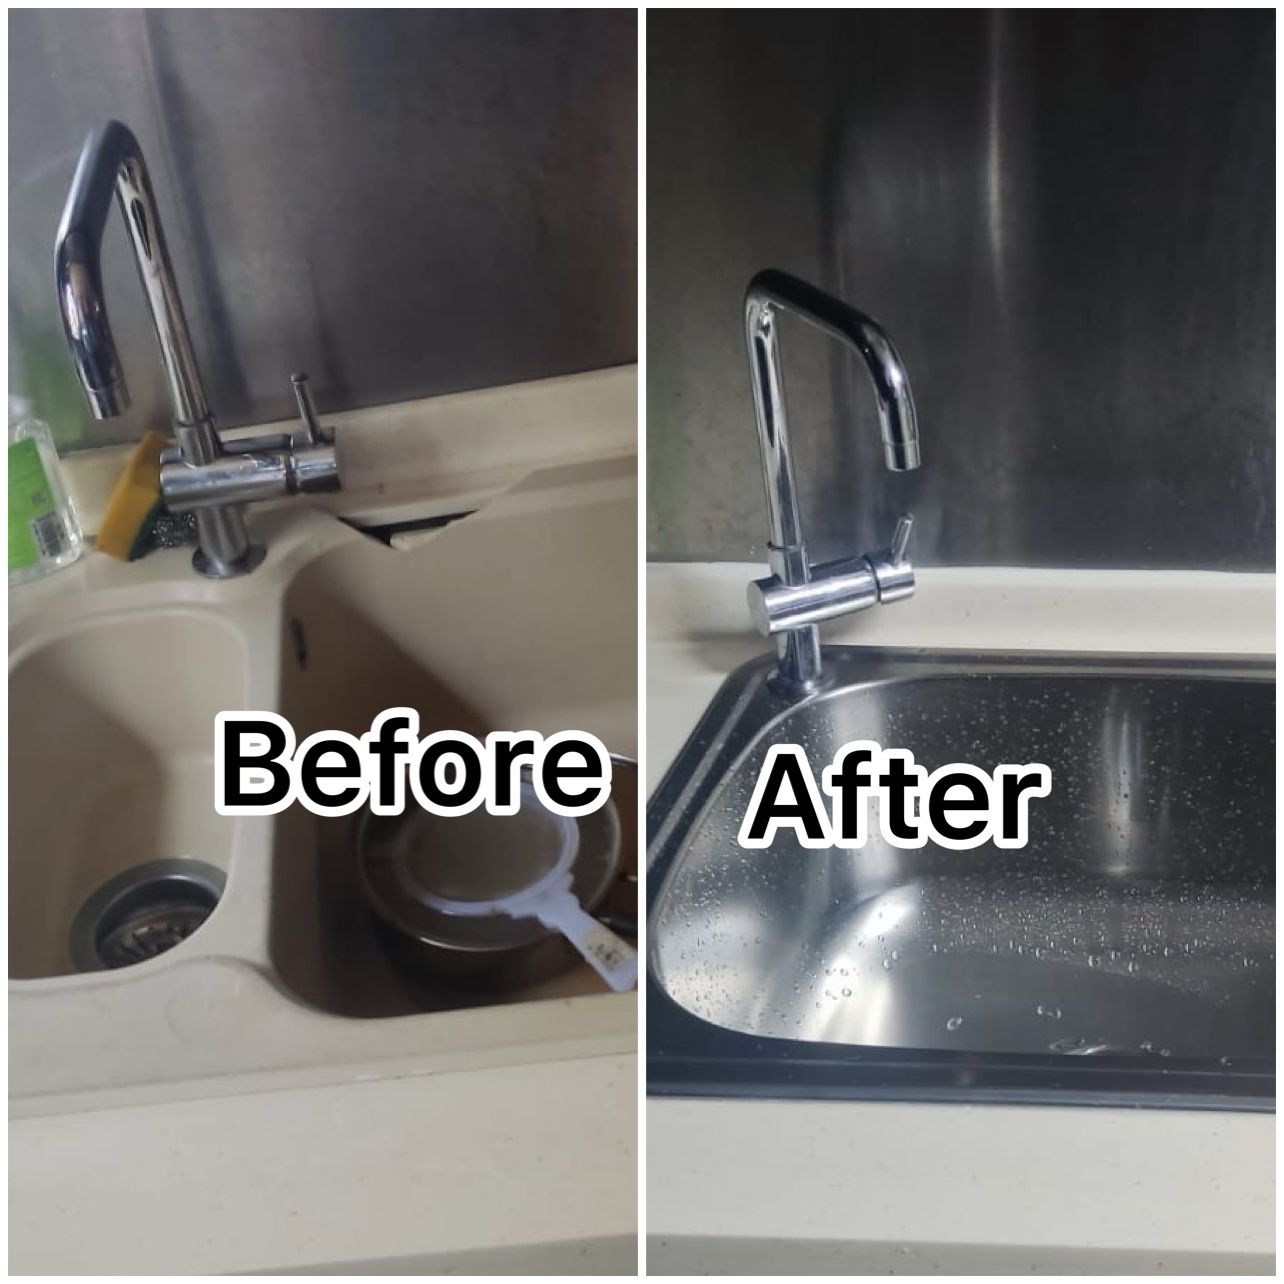
All of a sudden we have problem while using sync call. Which in turn disrupts our daily work. Replacing a sink faucet is a common household task that can be accomplished with the right tools and steps. Here's a detailed guide to help you replace a sink faucet:
Tools and Materials Needed:
- New faucet
- Adjustable wrench
- Basin wrench (optional but recommended)
- Plumber's tape (Teflon tape)
- Bucket or towel
- Flashlight (optional but helpful)
- Penetrating oil (such as WD-40)
- Towels or rags
- Safety glasses
Steps to Replace a Sink Faucet:
1. Preparation:
- Turn off the water supply to the sink. The shut-off valves are usually located under the sink. Turn them clockwise to shut off the water flow.
- Open the faucet to drain any remaining water in the lines. Place a bucket or towel under the sink to catch any drips.
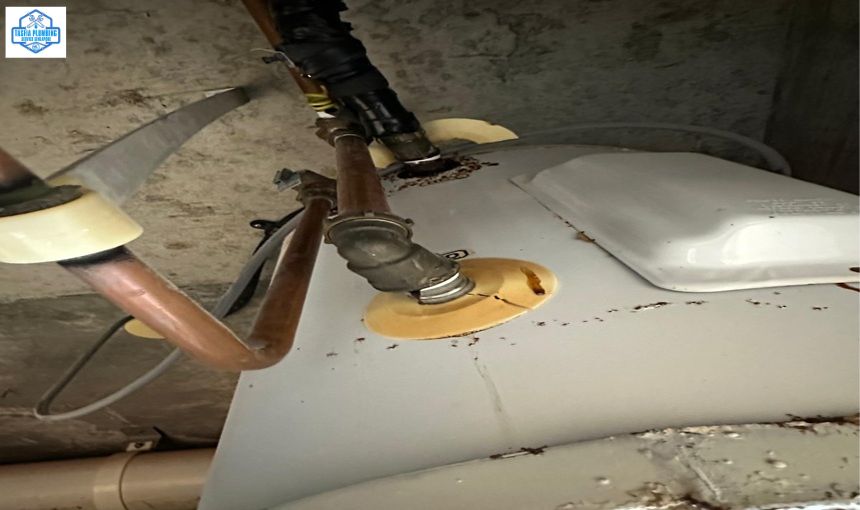
2. Remove the Old Faucet:
- Use an adjustable wrench to disconnect the supply lines from the faucet valves. Place a bucket or towel under the connections to catch any water.
- If the nuts are stuck, you may need to use penetrating oil to loosen them. Let it sit for a few minutes before attempting to remove the nuts again.
- Once the supply lines are disconnected, use a basin wrench to remove the nuts holding the faucet in place underneath the sink.
- Carefully lift the old faucet out of the sink, taking care not to damage the surrounding area.
3. Clean the Area:
- Use a rag or towel to wipe down the area where the old faucet was installed. Remove any debris or old plumber's tape.
4. Install the New Faucet:
- If your new faucet requires assembly, follow the manufacturer's instructions to assemble it correctly.
- Apply plumber's tape (Teflon tape) to the threads of the faucet connections. This helps create a watertight seal.
- Position the new faucet into the mounting holes on the sink.
- Secure the faucet in place underneath the sink using the nuts provided with the new faucet. Use a basin wrench to tighten the nuts securely.
5. Connect the Supply Lines:
- Reconnect the supply lines to the faucet valves. Use an adjustable wrench to tighten the connections, but be careful not to overtighten and damage the fittings.
- Double-check all connections to ensure they are tight and secure.
6. Turn On the Water Supply:
- Turn the shut-off valves under the sink counterclockwise to restore the water supply to the faucet.
- Slowly turn on the faucet and check for any leaks.
- If you notice any leaks, tighten the connections further or reapply plumber's tape as needed.
7. Test the Faucet:
- Turn the faucet on and off to ensure it functions properly.
- Check for any leaks around the base of the faucet and at the supply line connections.
- If everything looks good, clean up any remaining mess and discard the old faucet properly.
Additional Tips:
- Read the manufacturer's instructions that come with your new faucet for specific details and any additional steps.
- Take your time during the installation process to ensure everything is done correctly and securely.
- If you encounter any difficulties or are unsure about something, don't hesitate to consult a professional plumber for assistance.
.jpg)