
.png)


.webp)
- Anowar
- 28 June, 2024
Basing cabinet repair service
With our dedicated team of skilled artisans and technicians, we specialize in breathing new life into worn, damaged, or outdated cabinets ensuring they regain their former glory. Our goal is not just to repair cabinets but to elevate them seamlessly blending functionality with style to enhance the overall appeal of your basin cabinet. Trust our Tasfia plumbing expert team to revitalize your cabinets by transforming them into the focal point of your home. Experience the difference with our basing cabinet repair service and read our guide below.
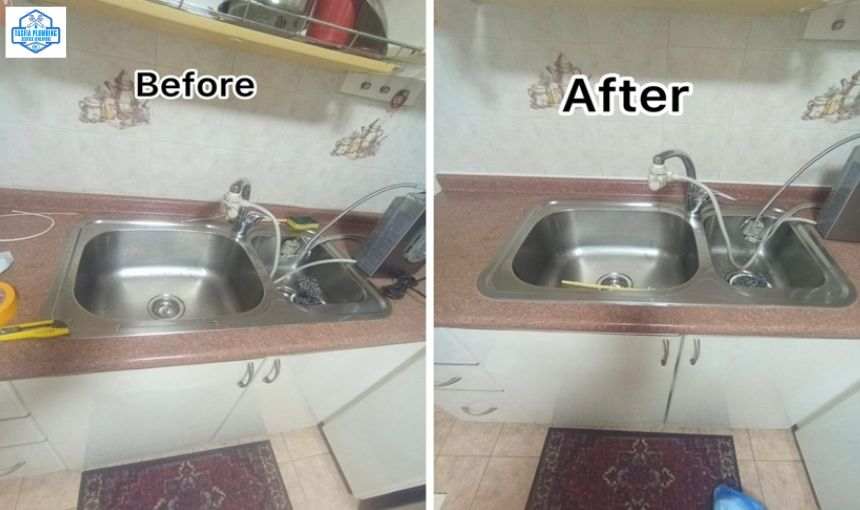
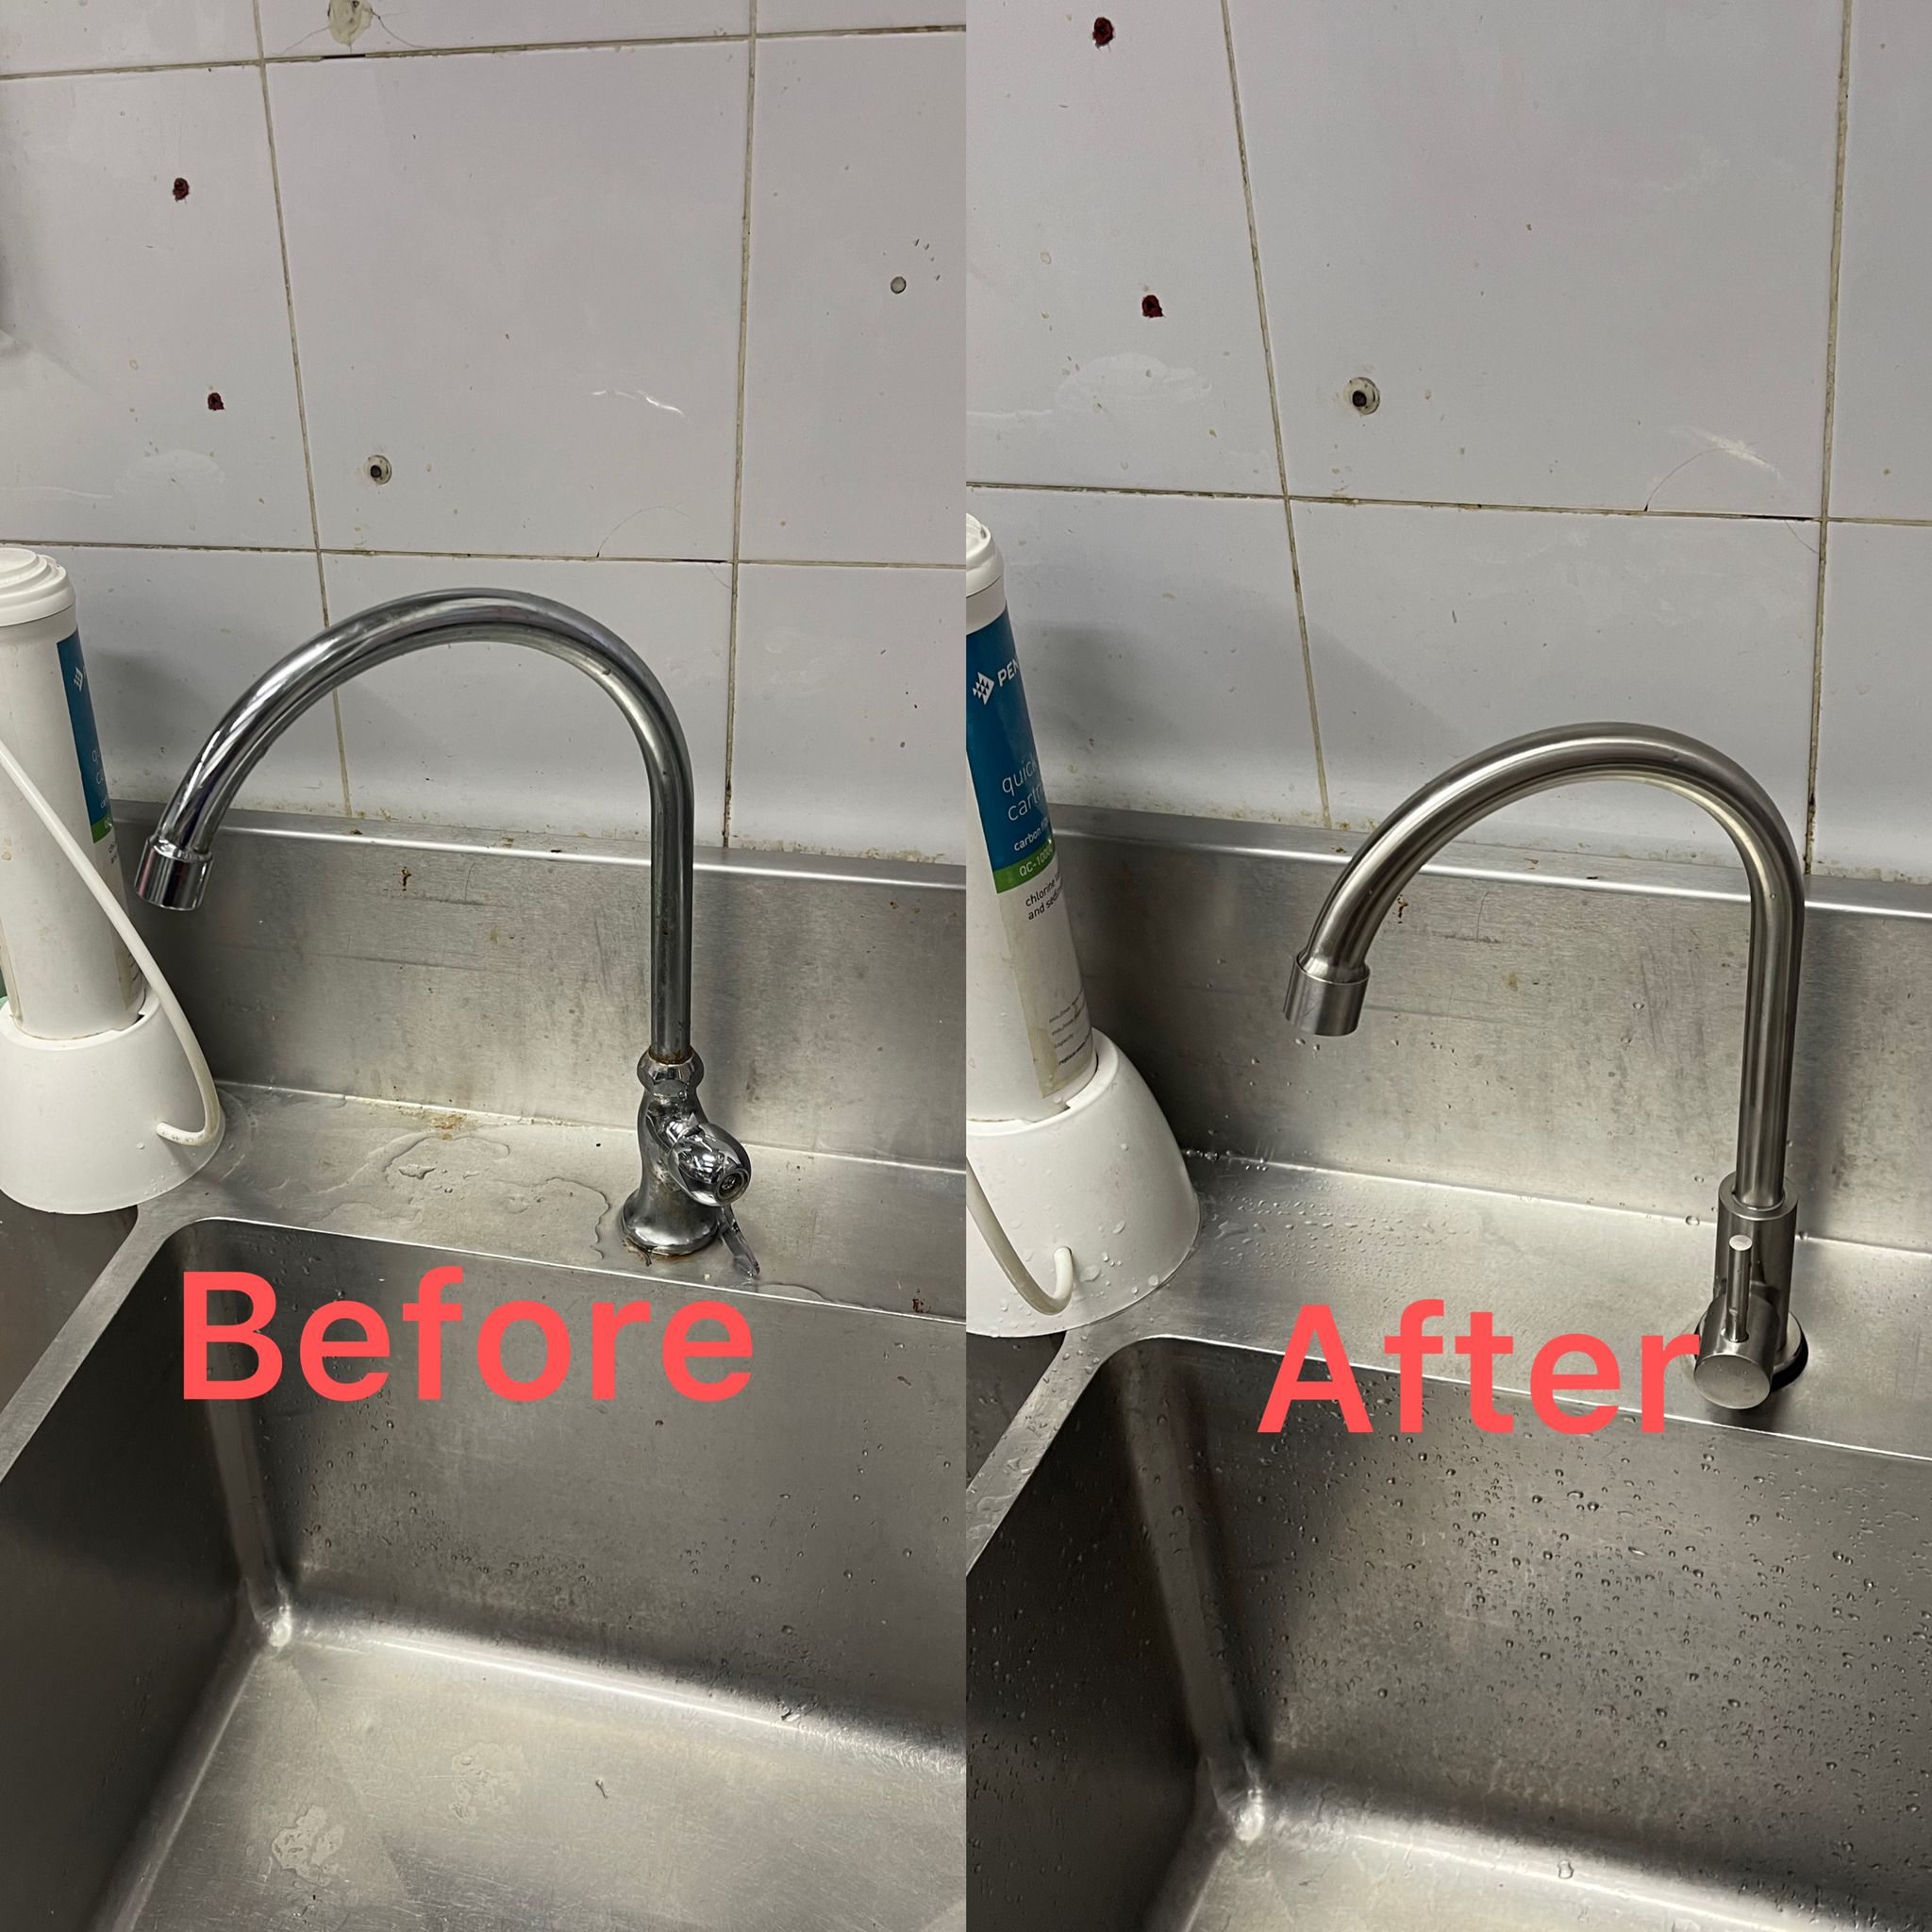
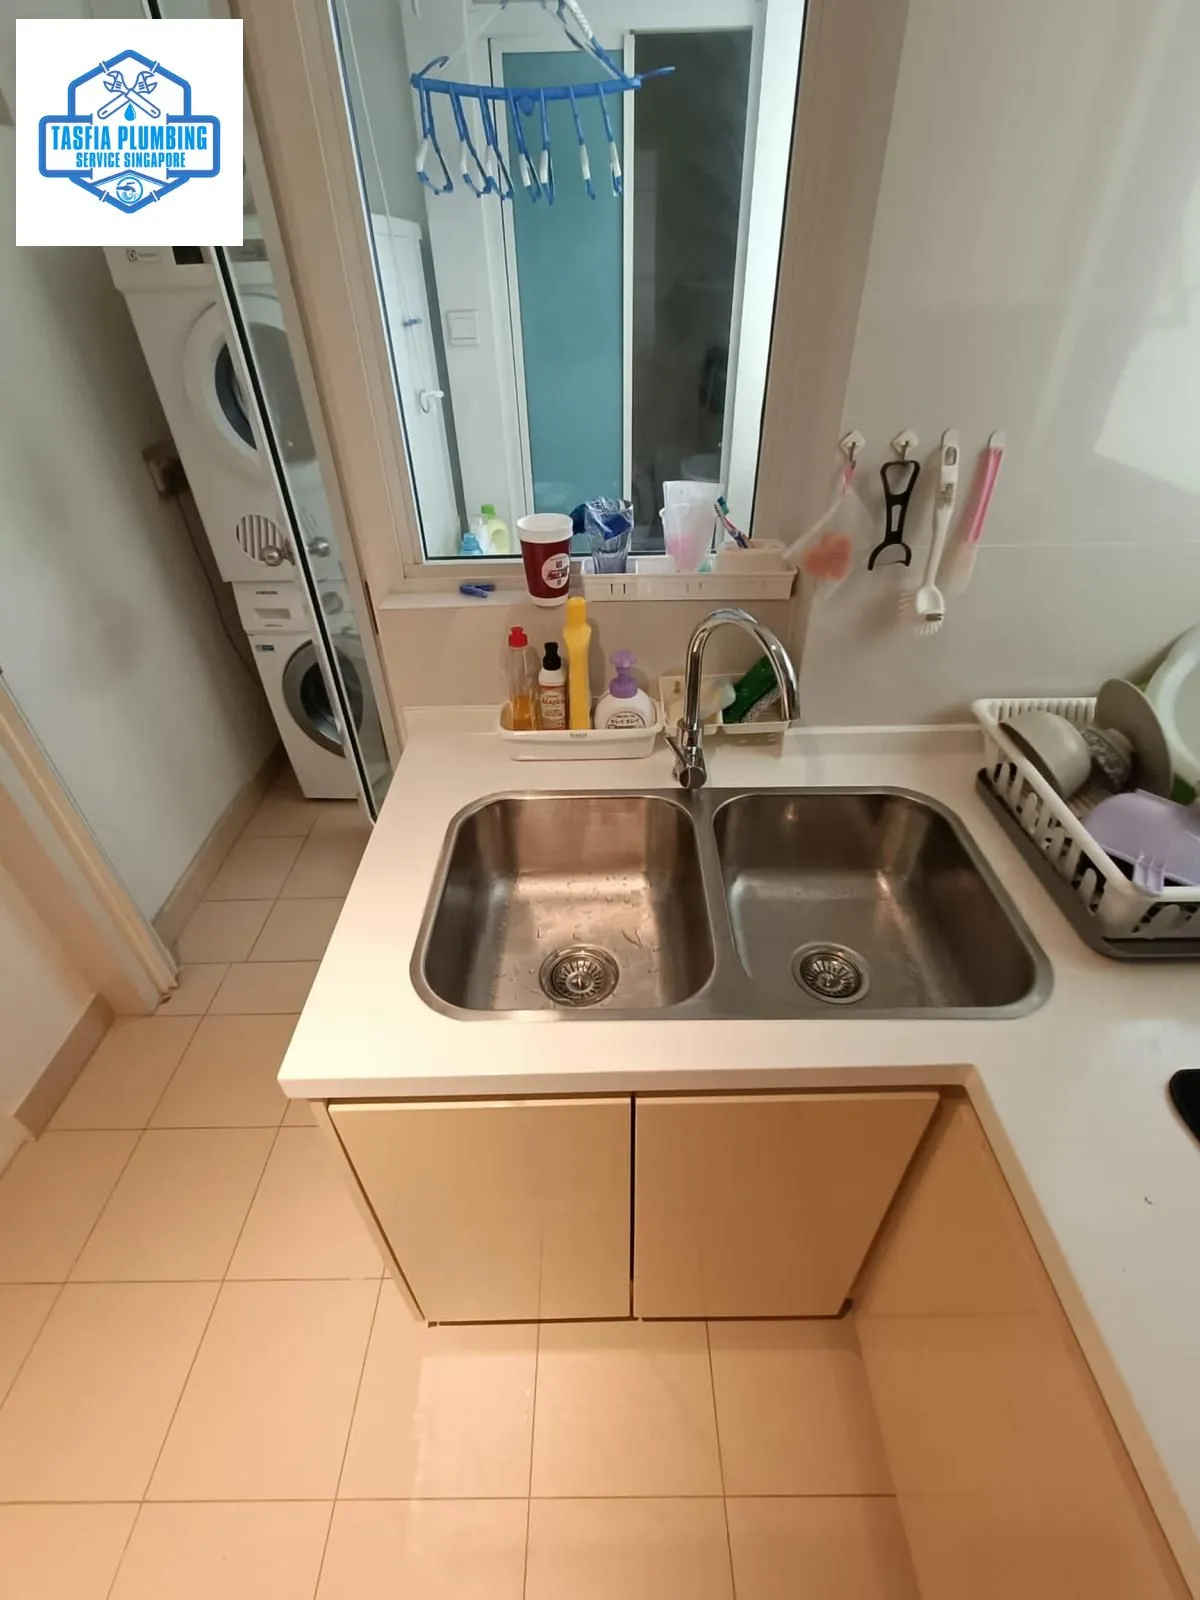
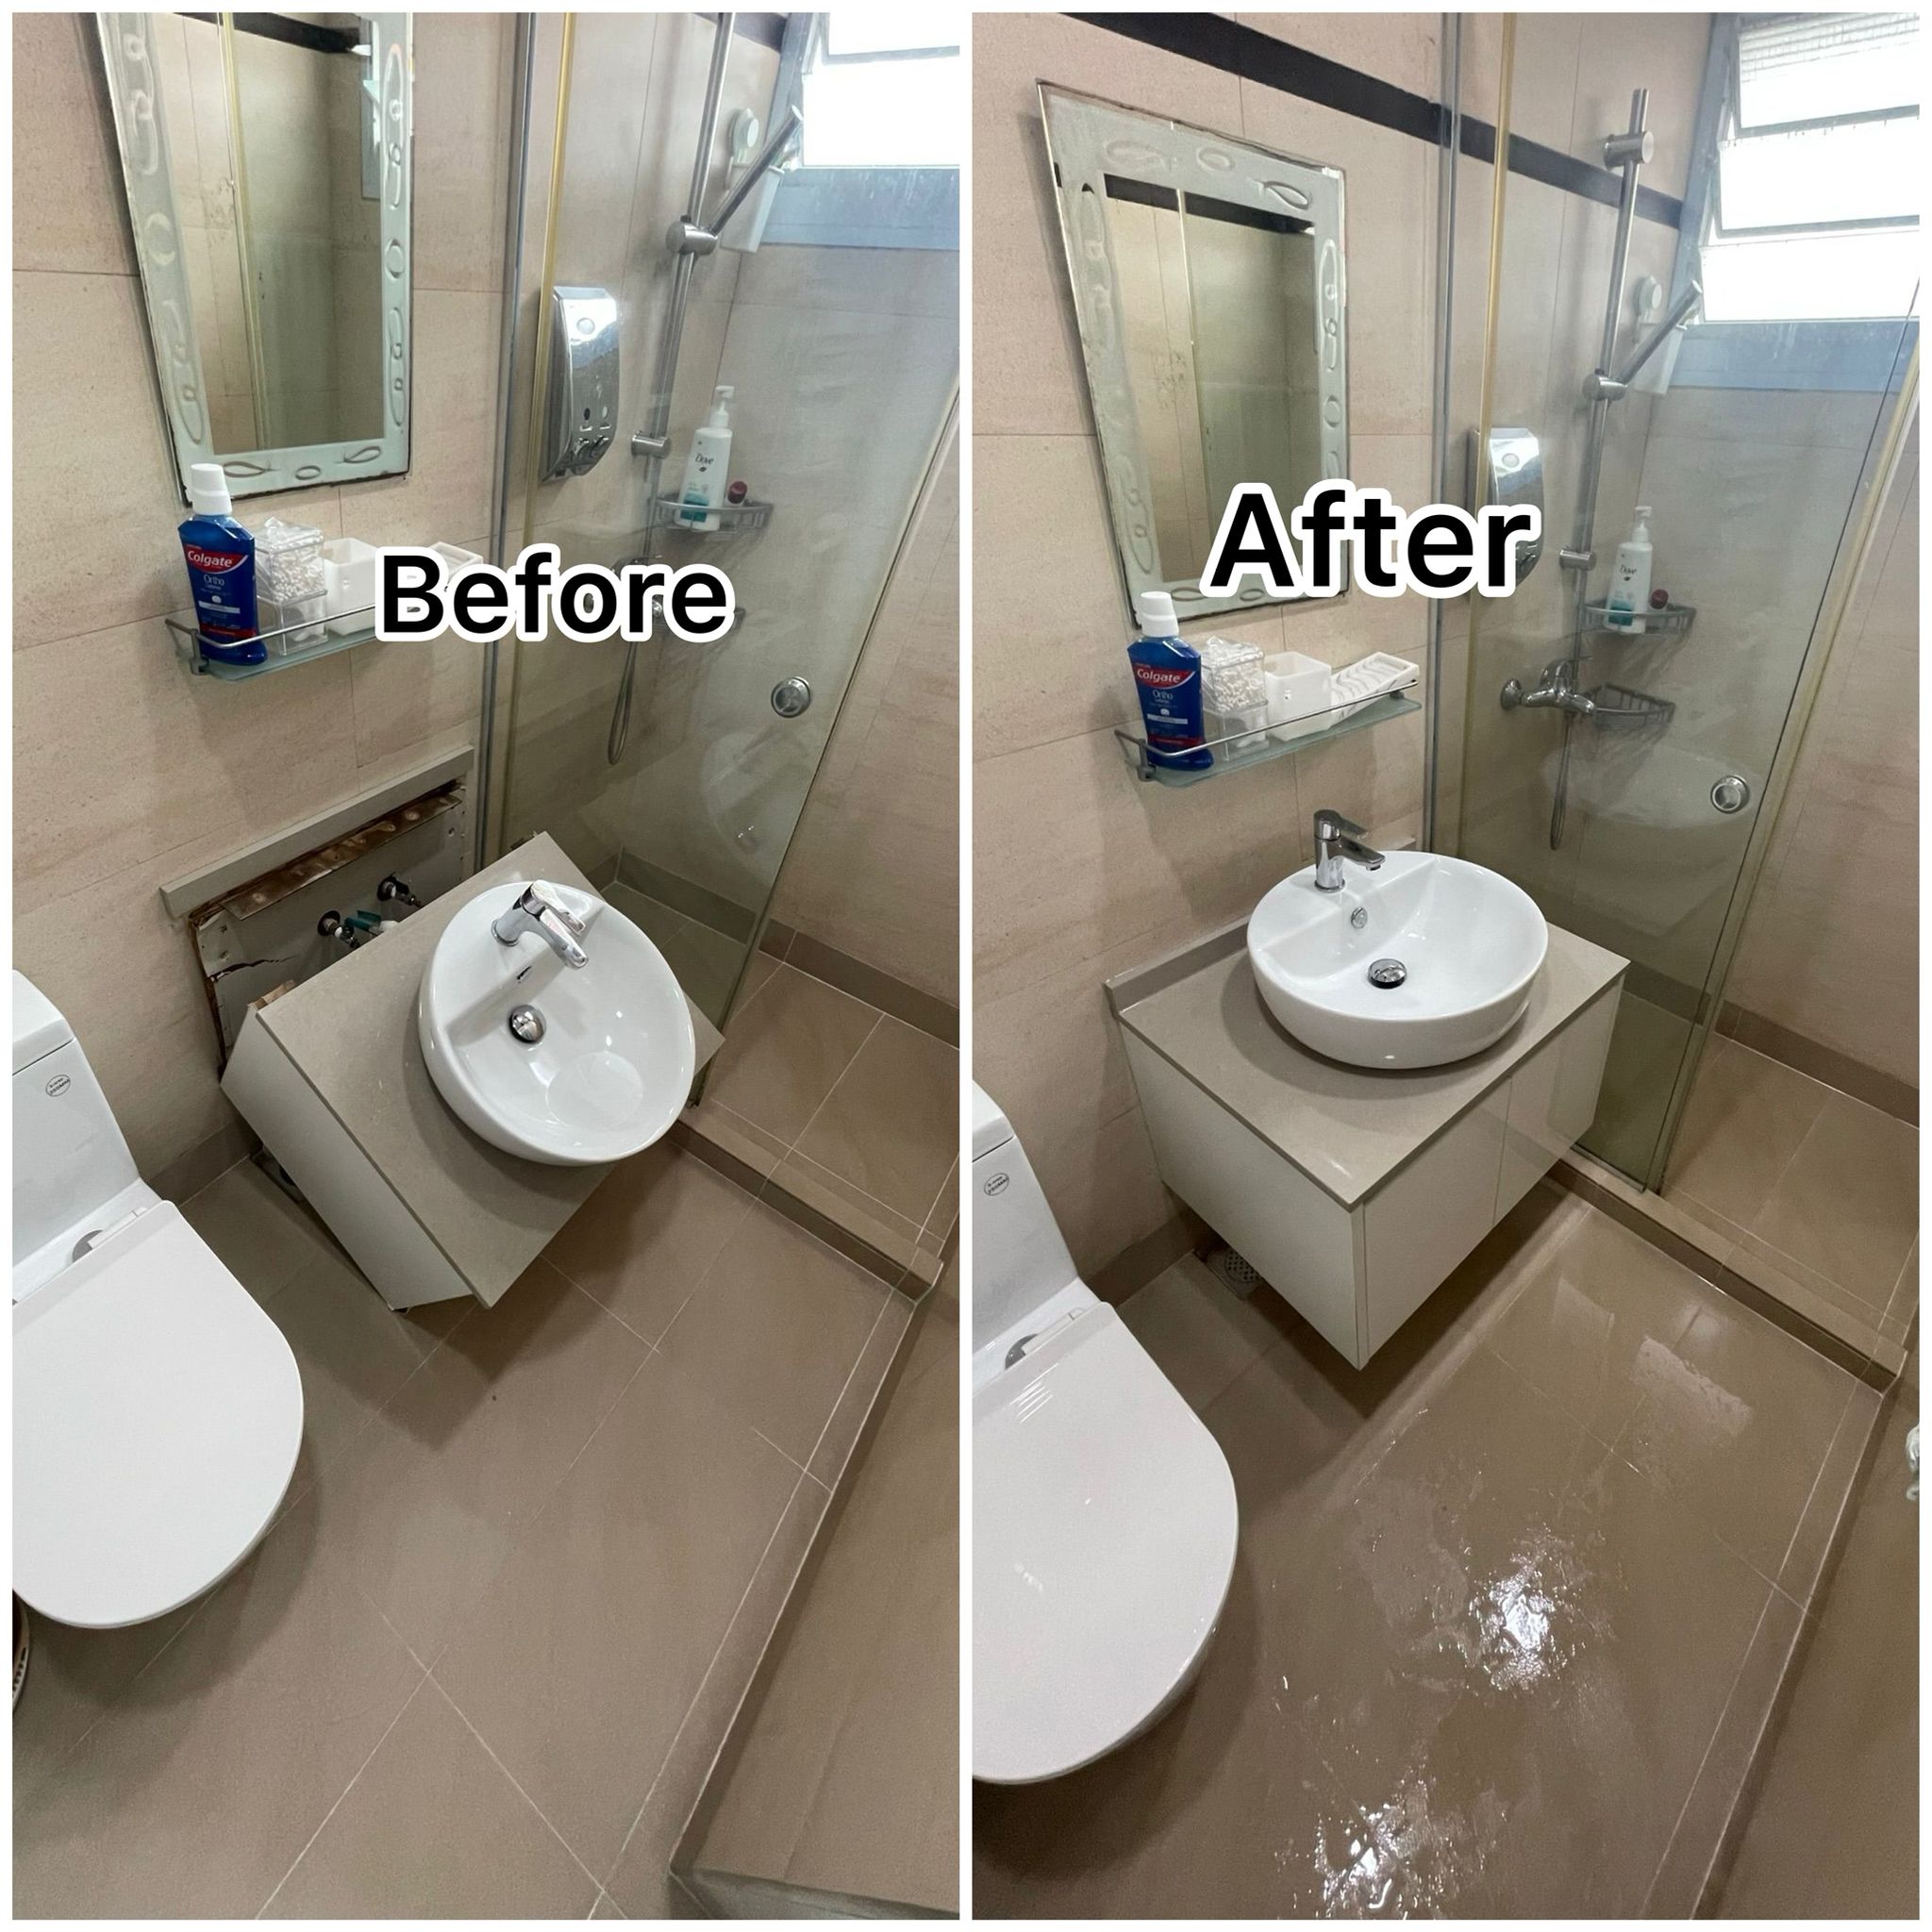
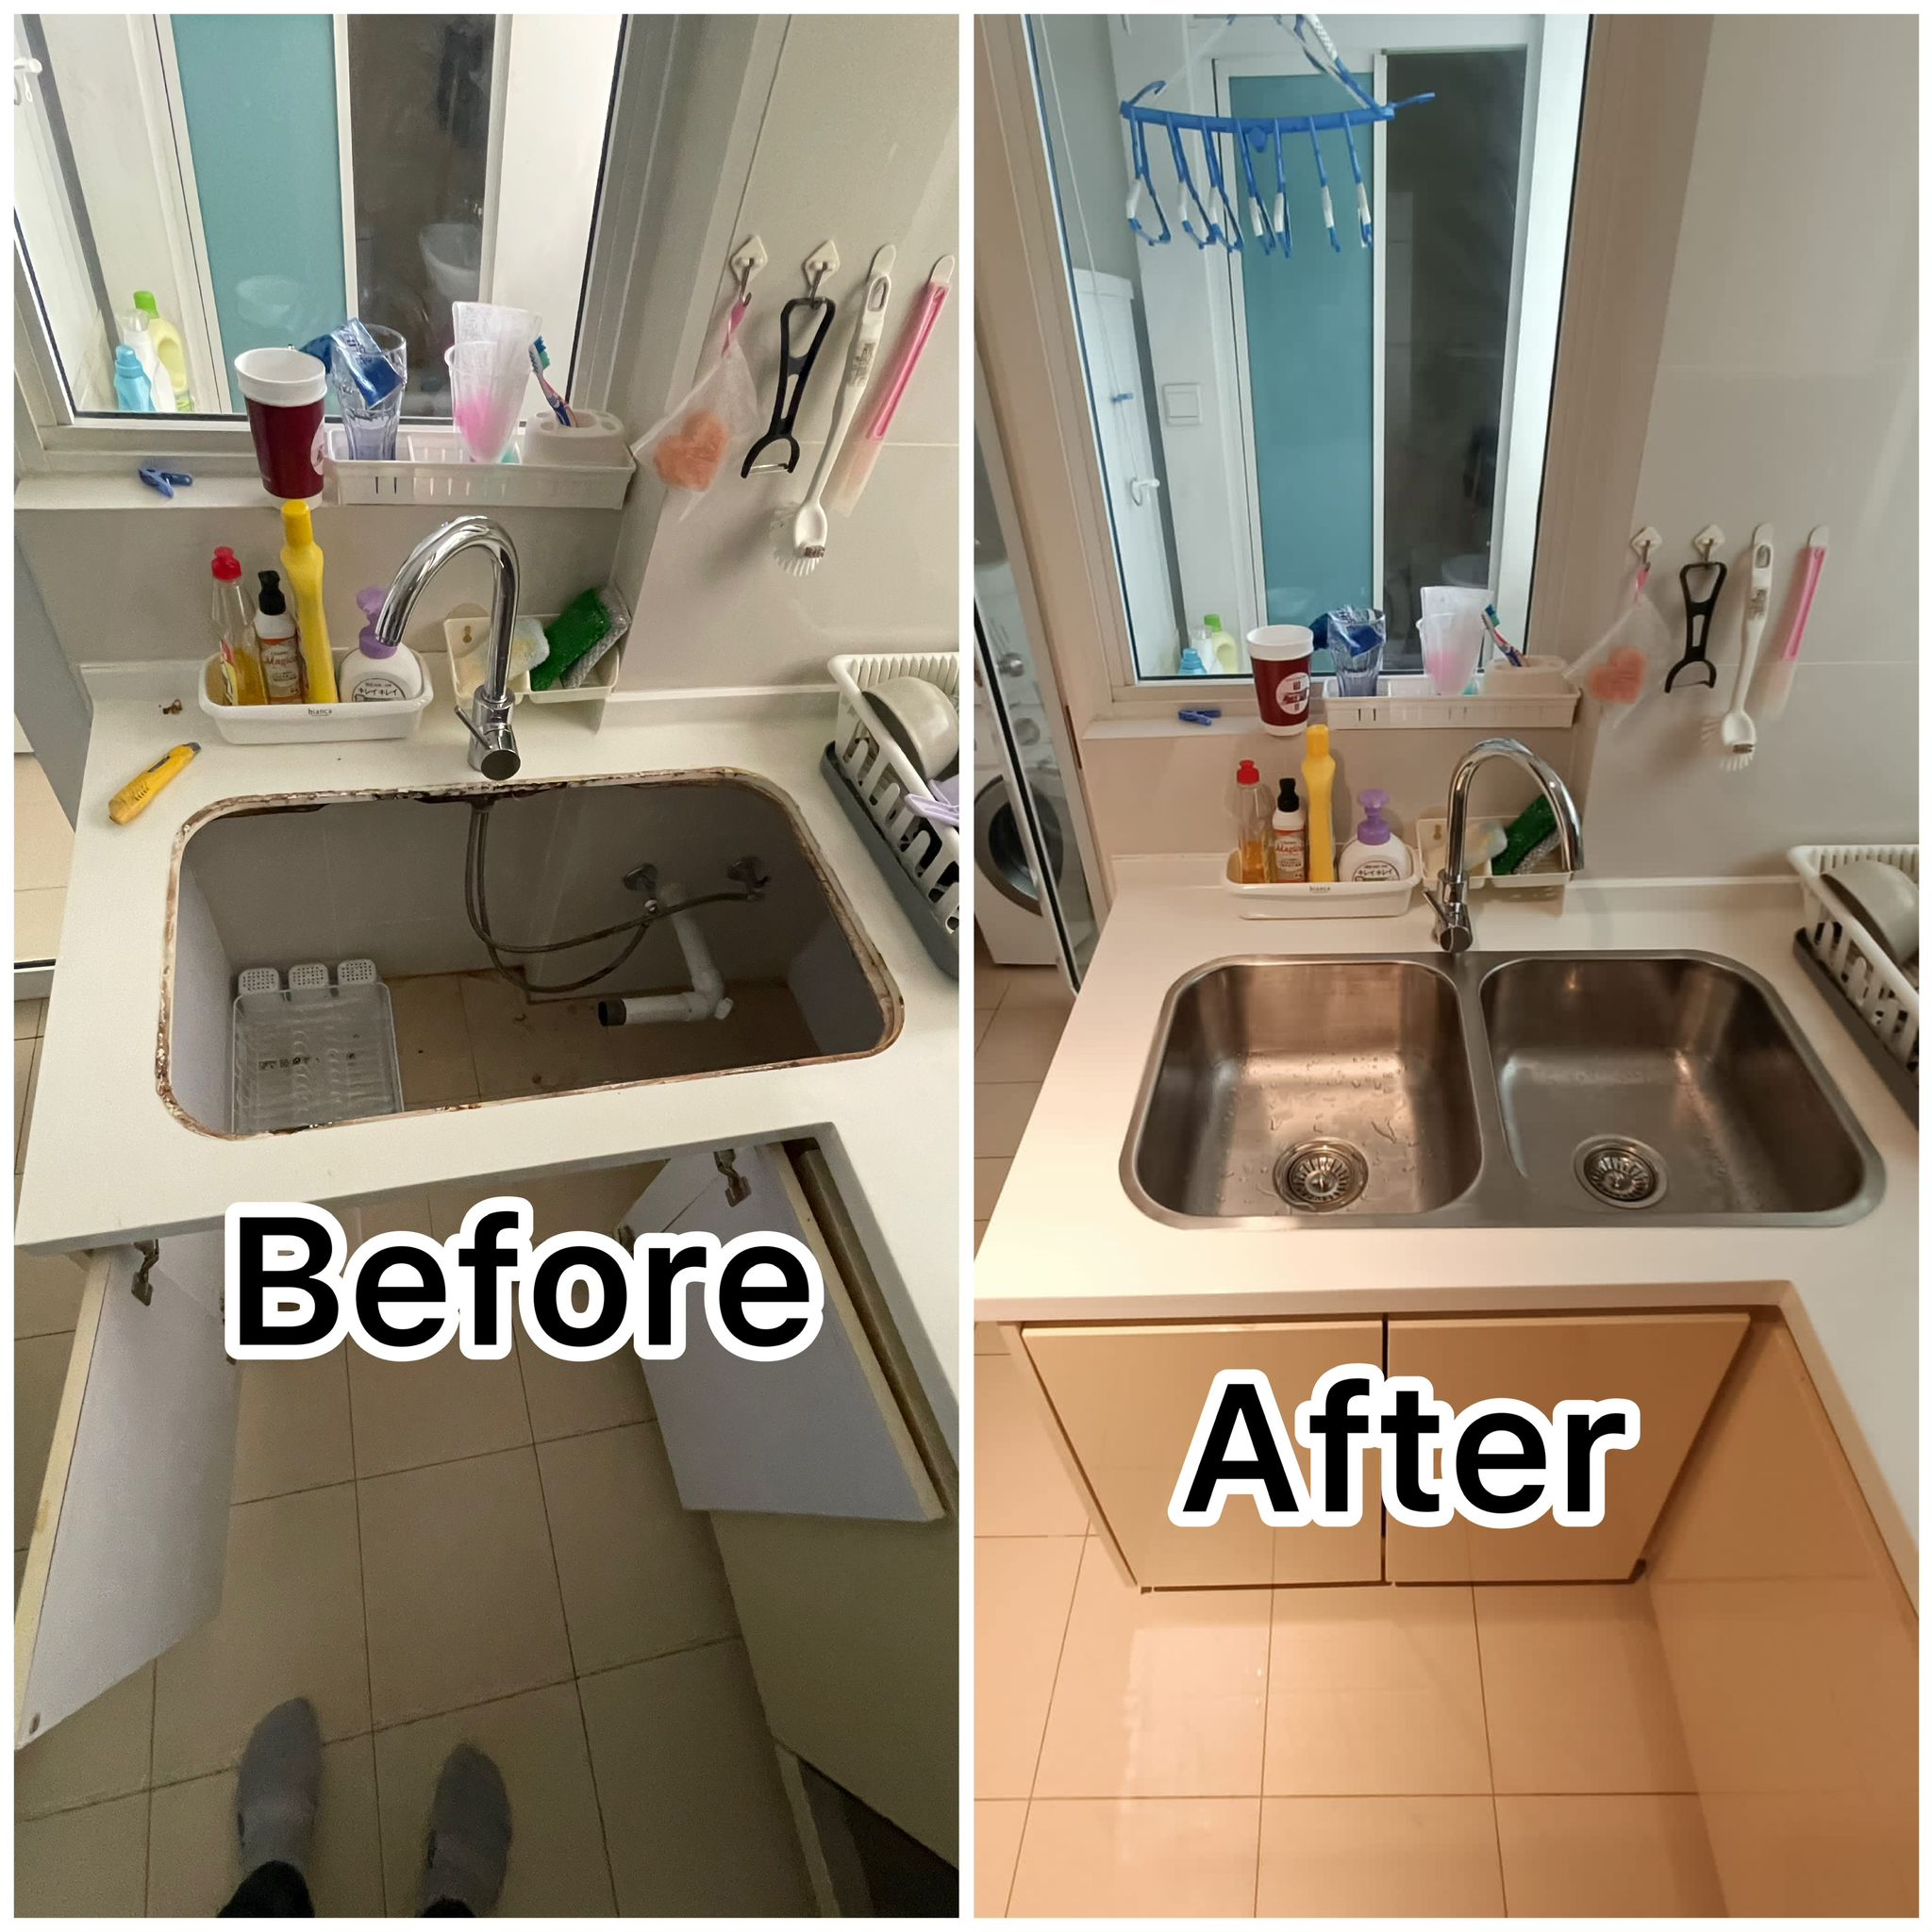
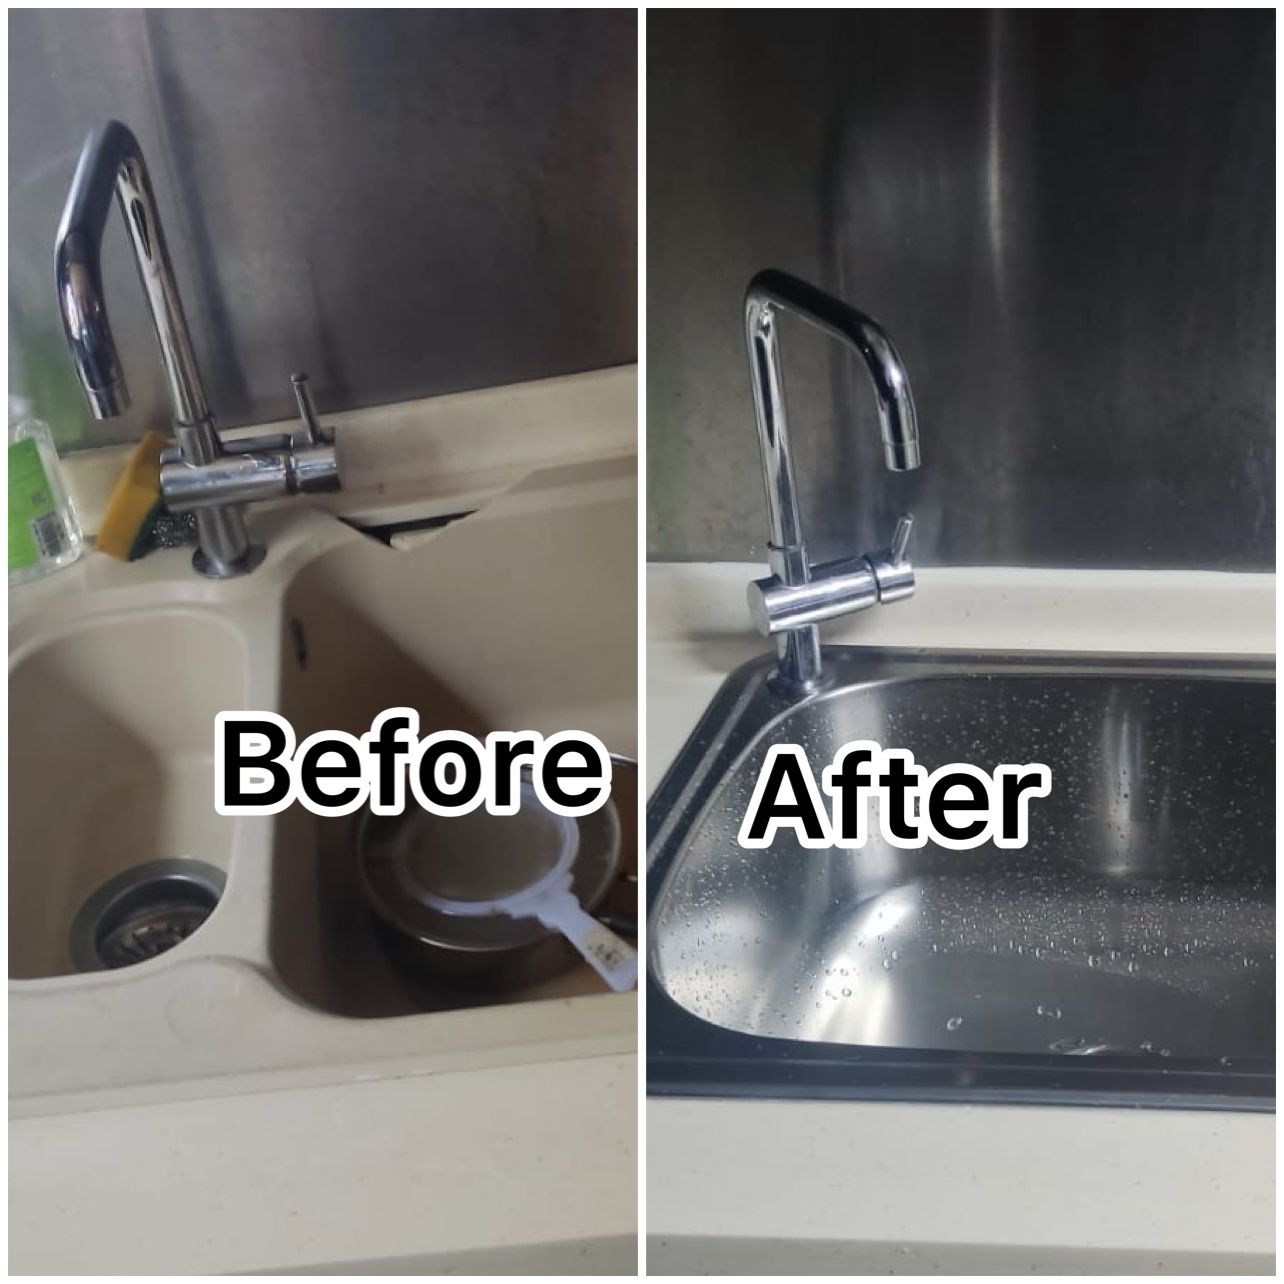
Are you thinking of repairing your basin cabinet. You can trust our Tasfia plumbing services.
With our dedicated team of skilled artisans and technicians, we specialize in breathing new life into worn, damaged, or outdated cabinets ensuring they regain their former glory. Our goal is not just to repair cabinets but to elevate them seamlessly blending functionality with style to enhance the overall appeal of your basin cabinet. Trust our Tasfia plumbing expert team to revitalize your cabinets by transforming them into the focal point of your home. Experience the difference with our basing cabinet repair service and read our guide below. Here's a detailed guide on how to repair a basin cabinet:Tools and Materials Needed:
Screwdriver, Sandpaper, Wood filler, Paint or stain, Replacement hardware Cleaning: Clean the cabinet surfaces with a mild detergent and water to remove any dirt or grime. Allow it to dry completely before proceeding.
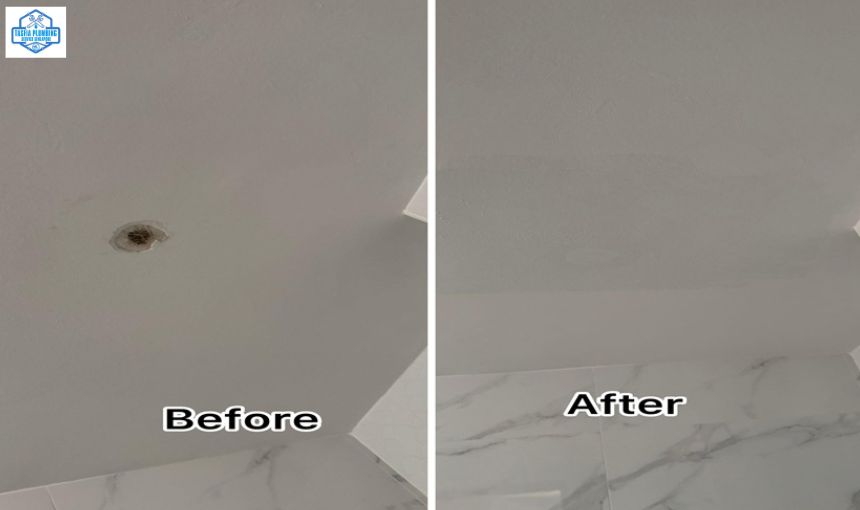
Repairing Water Damage:
If the damage is severe, you may need to replace the affected panels or components.
Fixing Loose Hinges:
Tighten any loose screws on the hinges using a screwdriver. If the screw holes are stripped, fill them with wood glue and toothpicks or wooden dowels, then reattach the hinges once the glue is dry.
Repairing Scratches or Surface Damage:
Lightly sand the scratched or damaged areas to smooth out the surface. Apply wood filler to any deep scratches or gouges and allow it to dry. Sand the repaired areas again until smooth and blend them with the surrounding surface.
Finishing Touches:
If necessary, repaint or retain the cabinet to match the original finish. Apply a protective coat of varnish or sealer to the repaired areas to ensure durability and longevity.
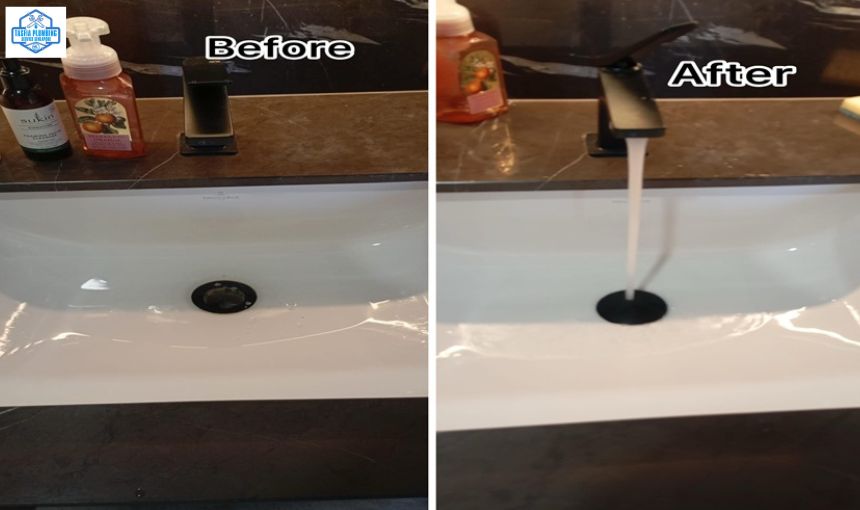
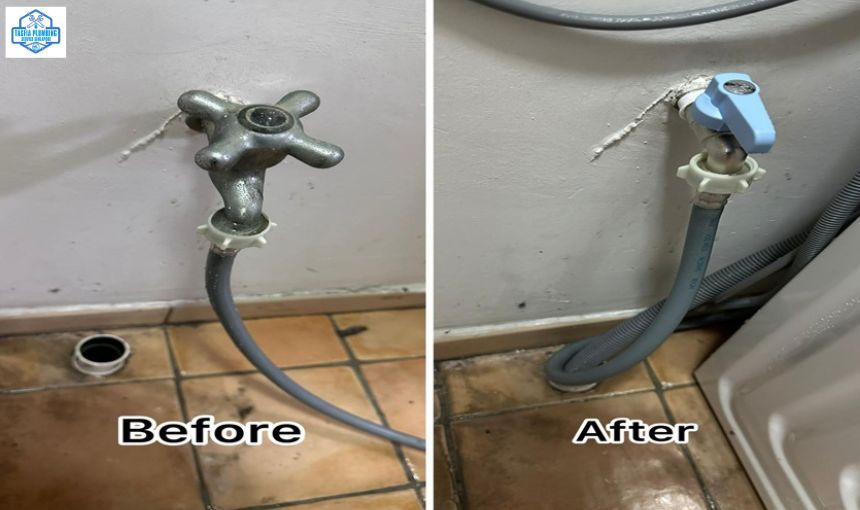
Replacing Hardware:
If any hardware such as handles or knobs is damaged or worn out, replace them with new ones. Make sure the new hardware matches the style and size of the existing ones. Once all repairs are complete and any paint or finish is dry, reassemble the cabinet and ensure everything is securely in place. Testing: Test the cabinet doors and drawers to ensure they open and close smoothly without any issues.
.jpg)